

Home
Dust Collection Basics
Equipment
Ducting & Hoods
Wood Toxicity Table
Testing
FAQs
Projects
Administrative
Financial Help
Contact & Email

Muffler by Dave Belliveau
- Introduction
Building a muffler is not a difficult task and the result works fairly well. Using a length of heavily insulated HVAC pipe will accomplish nearly the same noise reduction, so many choose not to make a muffler. At the same time, they do help considerably. Dave started with my exploded diagram below and did an excellent job on his. He was kind enough to allow me to share his efforts. After having made a number of these, I've inserted a few comments here and there in blue to help.
bill

- Required Materials
- 2' piece of 12" diameter snap duct
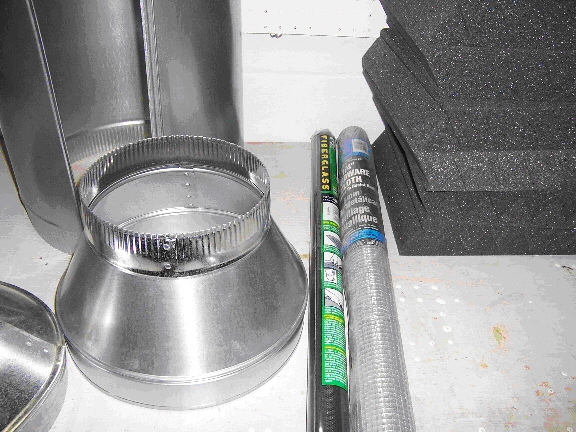
- one 8"-to-12" increaser
- one 8"-to"12" reducer
- a roll of 1/4" hardware cloth 3' x 5'
- a piece of fiberglass screen 3'x 5'
- acoustic foam squares
- 3' x 3' fiberglass insulation
- some polyurethane caulk or duct sealant
- some 1/8" short pop rivets or six small sheet metal screws
- Material Notes:
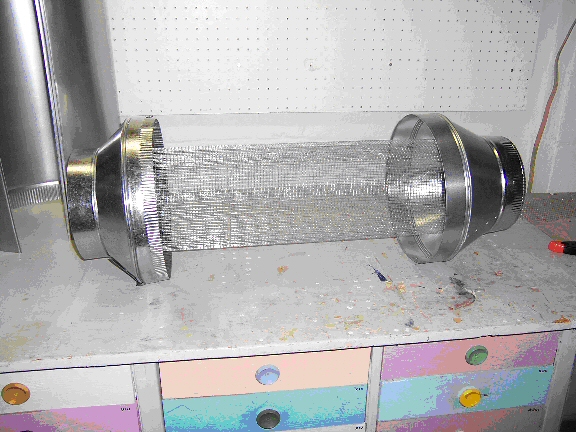
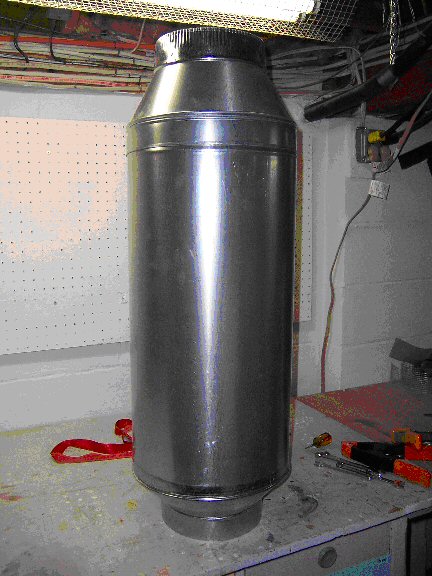
Transitions: I chose to use a reducer on one end and an increaser on the other end, the difference being that the reducer has the small end crimped and the increaser has the large end crimped. In retrospect, I should have chosen 2 reducers because I think that it makes the muffler look better, and I am going to attach an insulated flex duct to each end. The crimped small end would make the duct fit on a little easier. If you choose this method, be aware that you will have to crimp the uncrimped end of the snap-lock duct with a pair of HVAC crimpers. I borrowed a pair from the carpenter across the street who always wanted to be a sheet metal guy.
Foam: I used 2" thick wedge style acoustic foam in 1 square foot sections that I found on EBay. The leftover foam was used to line my ceiling above and the walls around the cyclone motor. I was unable to find the foam in 1" thick, but I'll bet if I looked harder I would have found a piece of foam about 1" thick by 3' by 4'. Although the acoustic foam works best, you can get very similar results for far less money by instead using medium density upholstery foam.
Fiberglass Insulation: I've made these mufflers using only foam as Dave did, only fiberglass insulation, and with both as shown on my pictures. Using both with a layer of fiberglass insulation outside of the foam gives the most reduction in sound. I suspect these different materials are each better at dampening different frequencies, so when used together they do an overall better job. When you use both, make sure you allow for 4" of reduction to provide 1" of each material on each side. Packing either too tight kills their ability to provide good sound deadening.
Instead of a large sheet of fiberglass insulation, I found that buying a few lengths of the 6" wide pipe wrap fiberglass insulation works better. This lets me use that insulation to hold the foam to the hardware cloth and is easier to work.
- Costs (In 2005 $):
Item Cost 12" x 2ft snaplock duct $10.24 12" to 8" reducer $ 9.89 8" to 12" increaser $11.21 (Weird huh) 48 sq ft of 2" wedge foam $37.00 + 10.00 shipping from foam factory 3' x 5' 1/4" hardware cloth $ 7.94 at Home Depot 3' x 6' fiberglass screen $ 6.27 at Home Depot Screws/rivets $2.00 Total: $84.55 or $94.55 including shipping
- Time to Build:
About 1 to 1.5 hrs
- Construction:
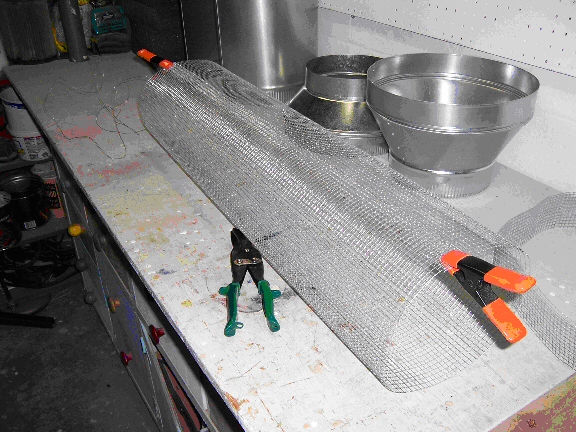
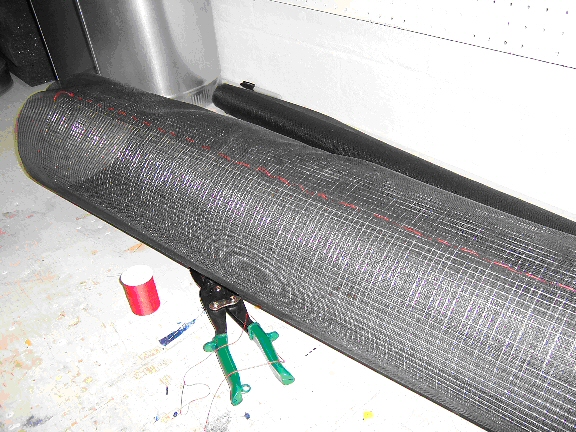
I wanted to end up with an 8" inner tube in the muffler, so I did the calculation pi x d, and came out with (3.1415926 x 8)= 25 ¼ inches. For the length I assembled the pipe with the 2 ends on it measured the total length and subtracted 2 inches, one inch for each end. This let me cut the ¼" hardware cloth 25 ¼" by 33".
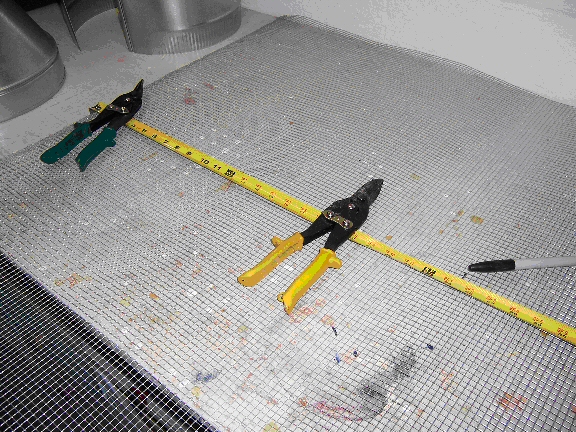
Once the piece is cut, I rolled it into a tube and made sure it fit by putting both ends of the muffler on it. Much to my surprise, the hardware cloth overlapped itself by about 1".
Satisfied that I had the correct size, I assembled the tube by using 2 spring clamps to hold it together.
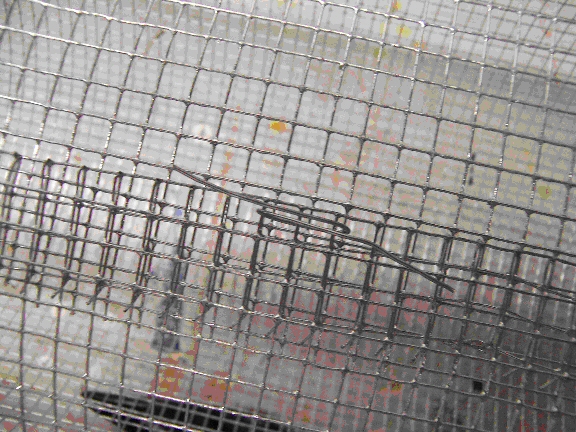
I then sewed the hardware cloth together by using the wire that came with the hardware cloth.
Although this works, in doing lots of work with hardware cloth, I've found it better to cut right next to the vertical wire leaving bendable wires for the whole length. Bending these over on both sides makes for a very clean joint without having to do any sewing or use any additional materials. Also, on my own, I soldered each joint. Clearly overkill, but I tend to overdo on all of my projects.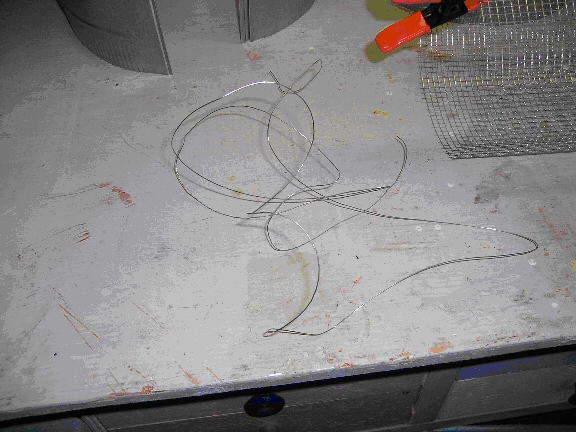
-
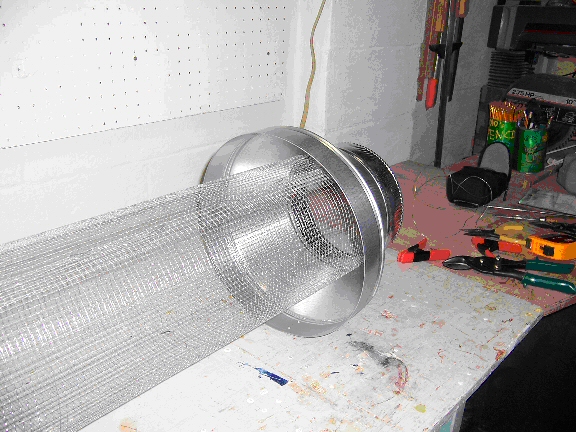
I cut the wire into about 3" pieces and weaved it through the mesh. I then folded over each end of the wire. I did this every 3 inches or so down the length of the tube.
I could also have used small plastic cable ties, or the garbage bag tie wraps that seem to multiply inside the kitchen drawer. -
Once the tube was assembled, I wrapped it with the fiberglass screening, and cut it to match the size of the hardware cloth.


Although the spray adhesive works well, make sure you only get it on the outside of the foam on the part that will stick to the metal snap-lock pipe. Any that gets on the inside of the foam will stick to dust and reduce the muffler's efficiency. With my using a layer of foam then a layer of fiberglass, I don't use any adhesive and instead hold the foam to the hardware cloth by wrapping it in the fiberglass insulation.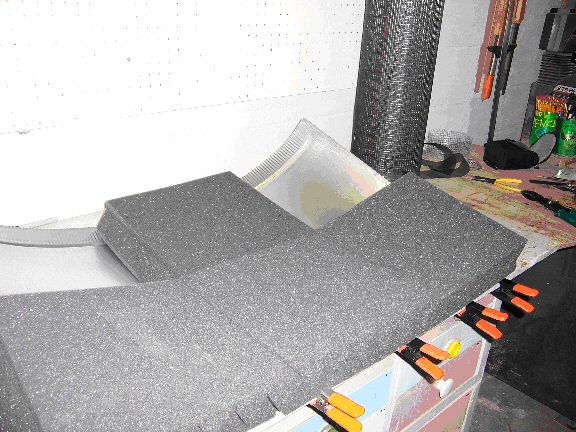
I then placed the hardware cloth tube on the foam bed, used the ends to check for placement, and closed up the assembly using a band clamp.
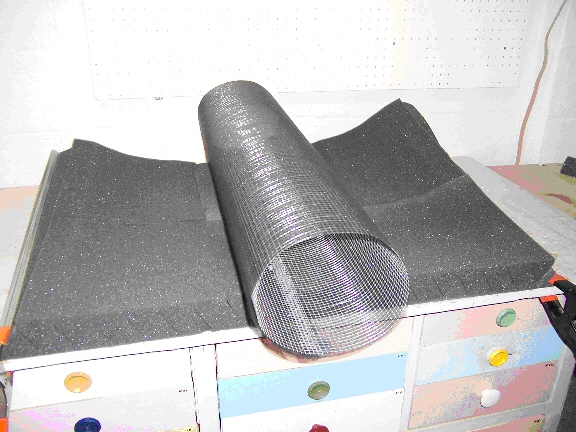
(If I had used the 1" foam, I would have wrapped the hardware cloth tube with the foam, then wrapped that with 1" of fiberglass and snapped the duct around the whole thing.)
-
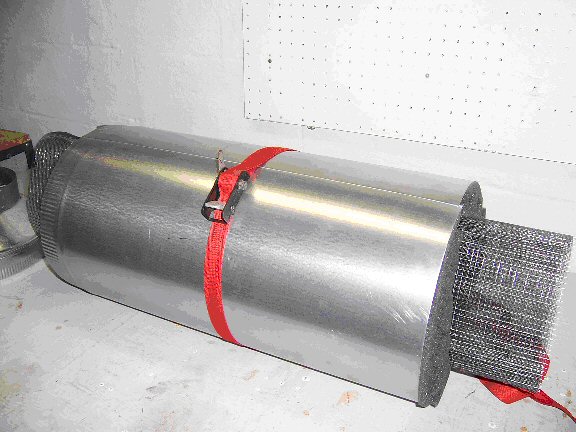
Once I got the duct to snap shut, I put some of the acoustic foam in the transitions so that they filled the void between the outer wall of the transition and the hardware cloth. Unfortunately I do not have a picture of this. If I had used sheet foam, I would have made sure that the foam extended beyond the end of the duct such that when I placed the transition on the end, the foam would just touch the wall of the transition.
-
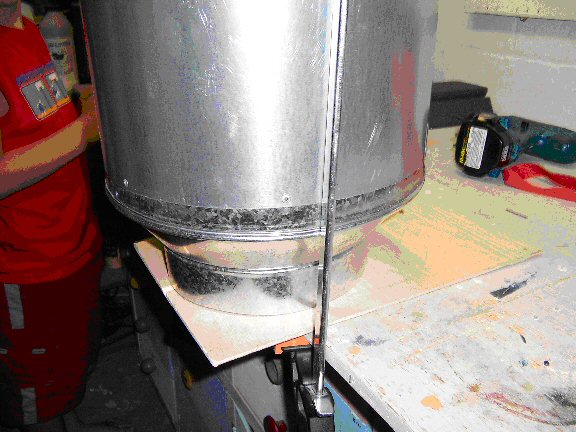
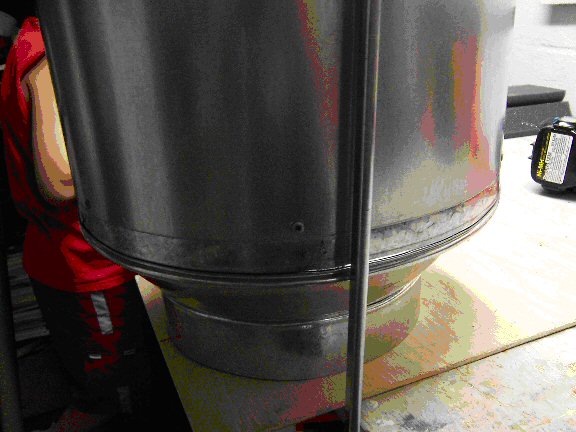
With the transitions now on the duct, I gently clamped the whole assembly vertically so that I could drill the holes for the rivets. I inserted the pop rivets about every 4 –6 inches or so around the periphery of each of the transitions.
The pop-rivets make for a nice looking unit, but make it harder to take all apart. We need to clean these about once a year so using sheet metal screws would probably be a better choice.
-
To finish up, I sealed all the seams with polyurethane caulk (silicon caulk reacts with galvanized metal and eventually comes off).