
Home
Dust Collection Basics
Equipment
Ducting & Hoods
Wood Toxicity Table
Testing
FAQs
Projects
Administrative
Financial Help
Contact & Email

Dust Collection Electrical
Table of Contents
- Foreword
Many small shop owners fail to realize that improper electrical work can void your insurance, cause severe injury, and burn up your motors, wiring, shops, and homes. Please install electrical components sized to support your equipment and use good electrical installation practices including following local electrical codes when installing electrical components, wiring, and distribution in your shop. This discussion focuses on dust collection (DC) wring and motors. I assume that you either are certified to do your own electrical work or you hire someone who is certified. This overview information is not a tutorial or an attempt to teach you how to do this kind of work. Please make sure the electrical work in your shop is safe.
The three most important electrical concerns are:
Electrical wiring, grounding and over-current and short-circuit protection for shop circuits;
Power switches, relays, and contactors; and,
Overload and overheating protection for electric motors.
- Electrical Safety
Safe electrical systems require:
Ample wire size, insulation, and protective covers
Properly sized and configured motors
Proper circuit breaker or fuse sizing
Proper equipment grounding
Appropriate plugs and connectors
Adequate switching current capacity
- Sizing Components
- Motor Sizing
Frankly, although it is best to use three phase power on our larger shop motors, most only have 240V power and do not want to mess with the added cost of getting a phase converter and changing out existing tool motors. With all dust collectors needing at least a 3 horsepower motor and cyclones needing a 5 hp along with many of our larger tools also needing 240V power, I recommend getting your shop wired with multiple 240V dedicated circuits.
- Voltage Cautions
Many call standard U.S. outlets 110 or 220 volt power because at one time long ago that was what these outlets delivered. Today these outlets across the U.S. and many foreign countries provide either 120 volt or 240 volt power. The transformer providing power to the building has a center-tapped secondary where the secondary winding's center-point wire is connected to ground (green wire) and the neutral (white wire), and the ends of the winding are connected to two 120-volt lines (line 1 and line 2) The two ends of the winding are always opposite each other, relative to neutral, so when one line is at 120 volts, the other is also at 120 volts, but opposite in polarity; thus, you have 240 volts across the two windings, but the voltage on any wire in the system will never exceed 120 volts AC, for improved safety by reducing dangerous voltages in the wiring system.
[Note that 3-phase power, due to phase angles between legs measure 120 volts from each leg to ground, and 208 volts between legs (240 volts times the sine of the 120-degree phase angle between legs). Some 240-volt motors will run successfully between two legs of a 208-volt 3-phase system, but the practice is generally not recommended.] - Grounding Cautions
The safety grounds in a building (green or bare wires) and the neutral wires (white or grey insulation) must NEVER be connected together except as setup in the main breaker panel for the building. This ensures a non-current-carrying safety ground from all grounded equipment back to the main building ground without risk of shock caused by other wiring errors or faults in the system. Also, in much of today’s solid state electronic equipment that ground is used as a reference for controlling signals, so improper wiring can burn up your computer and digital electronic based equipment.
We add up the amperage ratings to compute how big our circuit needs to be. For lighting circuits we add up the total wattage of lighting fixtures, then divide by 120 to get the amperage. For fluorescent lights we then add about a 20% overhead to cover the extra current draw to power the starters during startup. For example, a 200-watt incandescent bulb will draw about 1.7 amps, and two 80-watt fluorescent fixtures would draw about 160/120 times 1.2, or 1.6 amps. The total amperage then tells you how many amps are needed if all the lights in the shop are on at the same time.
For our tools that plug into standard wall outlets we instead add up the amperage for each tool to compute the maximum that we expect to use at any one given time. The reference plates on all power tools, electric motors, etc. have a stamped or printed amperage rating along with the voltage requirement. Don't forget to also include the amperage for any heaters, fans, flood lights, etc. that could also be plugged in and in use at the same time as our tools. The amperage for all items that are possibly going to be plugged in and used at the same time must be added in when sizing our outlet circuits.
For our larger tools that use 240 volt power, we mostly only want to use each with its own dedicated wiring and circuit breaker. It is not wise to hook up your dust collector and other tools to run off the same high amperage circuit because we would need such a large breaker that we would get no protection if there is a problem with a single motor. Additionally, depending upon what a motor is used to drive it can loaf along doing near nothing until challenged with say cutting a heavy piece of oak, or alternatively such as with a dust collector the motor can almost always be working at near maximum power. This gets us into a situation where we need to address three issues. How many amps does a motor pull as it starts, how much does it use in normal use, and how much is used under a load. We need to ensure our wiring and circuit breakers are setup to handle what we want to power. With most of the heavy induction motors that are typically used with our larger tools drawing as much as five times the power on startup as during regular use, we often need to use circuit breakers that do not trip with normal startup loads, yet provide some protection once the motor is running. From my reading of the electrical code, it appears that the code is mostly interested in protecting our home wiring, so we may well have to do more than the minimum to also ensure protecting our motors such as buy special slow blow motor rated breakers rather than way oversized breakers that will not trip even as our motors burn up.
For example: If I run my 20-amp stock feeder and my 30-amp table saw, my stock feeder is probably only pulling about 10-amps when in use and the table saw a maximum of about 20 amps when in use giving an in use total of only about 30 amps. The code says for 30 amps to use 10-gauge wiring and that I should use a 40-amp breaker (normally a 30-amp breaker or fuse is required on #10 wire. My electrician wired all my 240V power with 10-gauge wires and all have worked for me on my mostly 3 hp power tools and my fairly large welding equipment. Still, I turn on my saw and power feed separately. For my welders that have the same sized wiring because of their heavy start up loads each time I start a weld, I did have to go with special circuit breakers to handle those high start up loads).
Although most are based on national codes, each local area has its own special wiring codes so you need to comply with the codes for your area or you may lose your insurance coverage. When installing new electrical circuits, please appropriately size your wiring and circuits to protect yourself, shop and home.
The National Electrical Code specifies the minimum wiring sizes to ensure your wiring does not overheat. For normal service, you add up the total, maximum amount of current that will be drawn from a given circuit, and size the wire and circuit breaker or fuse accordingly. This code defines wire sizing, the number of wires in each run, protection requirements for the wiring, junction boxes, circuit breaker requirements, and even acceptable plug and receptacle configurations.
Standard U.S. home outlets provide 120 volt power with the home wiring able to carry a maximum of about 16 amps without overheating. A good 1.5 horsepower motor is about the highest that can be run off one of these standard wall outlets. These typical home circuits are wired with 14 gauge Romex type wiring which contains three separate wires for hot, neutral, and ground. Ground is specified as a wire with green or no insulation. Sadly many homes end up with the electricians intermingling the black and white as either hot or neutral in violation of code, particularly when wiring up switches, so always check with a volt meter before working with any wires.
Most U.S. homes also come with a few circuits which are wired for 240 volt operation. Today this standard calls for four wires and four pronged plugs, but for many years 240 volt power was provided with two hot wires and a ground. It turns out that although there are two hot wires, the cycles or phasing is exactly opposite so the hot wires can each be a return for the other. The main advantage of 240 volts is with two wires carrying the current you can support twice the amperage without overheating the wires. This is why heavy current draw appliances like large heating, ventilation, and air conditioning (HVAC) motors, electric ranges and electric clothes driers use 240 volt power. Having two wires carrying power lets our motors run smoother and cooler plus last longer. Three phased power adds one more hot 120 volt wire and provides even more smoothly running motors. Moreover, three phase power makes it possible to get rid of the expensive and fragile starting circuit found in most 120V and 240V motors making the motors cost less and last far longer. Unfortunately, very few homes have access to three phase power. With either a motor generator or a solid state phase converter we can convert our 240V power to three phase and many small shop owners choose to do just this saving far more than the cost of their phase converter in reduced cost of tools, plus end up with far smoother running tools whose motors will last far longer. Three phase power is beyond the scope of this discussion. Regardless, in shops that do not have three phase power the recommendation is to only use 240 volt power for motor that are 1 hp or larger. - Wire & Circuit Breaker Selection
- Wire Type
Almost all areas in the U.S. now require use of only UL approved wiring, insulation, coverings, conduit, junction boxes, power distribution boxes, outlets, plugs, breakers, etc. In some areas aluminium wire may be used in place of the copper, but due to corrosion and fire issues with aluminium most areas now require copper. My own personal experience with having to totally rewire a home that has serious problems with aluminium wiring left me a solid advocate of only using copper wire. Frankly, in my area there is no other choice because copper is the code requirement.
- Breaker Selection
The National Electrical Code requires that circuit breakers to be sized to support a steady load of 80% of breaker capacity. Fuses also must operate at less than 80% of their ratings. Fuses and circuit breakers on 240-volt circuits with inductive loads (welders, inverter power supplies, electric motors, etc.) must also be rated at not less than 600 volts interrupt rating with a current-breaking capacity of 10,000 amps to accommodate the collapsing magnetic fields in large motor windings that can generate for a short time huge voltages and currents. All U.S. wiring components should be UL listed. Canadian users should only use CSA rated devices, and those in other countries should adhere to your local standards. Be careful about ratings. Just because a switch is UL rated at 3 hp does not protecting us from that same switch if used with a 5-HP motor. Kickback voltage and current when the circuit opens can cause under rated electrical switches and other components to explode!
- Wire Sizing Guideline
14-gauge wire is rated for ongoing current loads up to 15 amps. Circuits in many homes, especially cost-conscious tract homes, use 14-gauge wiring in most of the house except the kitchen; even in the garage. This is a distinct disadvantage nowadays due to hair dryers in bathrooms, computers and other equipment in bedroom/home offices, etc. Avoid 14-gauge wiring in any new home if you are building.
12-gauge wire is rated for ongoing current loads up to 20 amps. But a 20-amp breaker must not be loaded above 16 amps of continuous current draw. This is adequate for most home shops running smaller motors with only one tool running at a time.
10-gauge wire is rated for ongoing current loads up to 30 amps, or 40 amps if you are running intermittently loaded motors such as on a table saw or joiner that is not being used for big production jobs or jobs where you are doing a lot of continuous cutting. With intermittent loads, you can use 40-amp breakers, because a 40-amp breaker should not be loaded at more than 32 amps continuous. Just be aware that you will have more heating in the wire, so it be as open to ventilation as possible. It shouldn't be buried under the insulation in an attic, for example, between the breaker panel and the plug in the wall. 10-gauge wire is rarely used on 120-volt circuits.
8-gauge wire is rated for ongoing current loads up to 50 amps. copper or 6-gauge aluminium wire for higher currents if needed. This can handle 40 amps continuously with a 50-amp breaker.
Always comply with local codes, use a certified electrician and ensure your electrical work is properly inspected before use. Please understand that many electricians who do home wiring lack the skills to properly size wiring and select appropriate breakers and plugs for our larger electric motors and welders. To ensure you get safe electrical systems please make sure the people you hire to do this work are knowledgeable about larger home and shop circuits.
- Wire Type
- Grounding
All electrical equipment must be properly grounded through the safety-ground (green or copper) wire. All electrical wiring must have the grounding wires properly connected to the building power distribution center. No exceptions. Failure to provide proper wiring grounds and properly ground all equipment can result in severe injury including death.
When using 240V power you should use the current four wire convention with a 4-wire cable and receptacles such as is used for new clothes dryers. Always connect these using the provided wiring instructions that come with your receptacles. In my case I connect the black and red wires (usual colors) to the L1 and L2 motor winding connections (the usual marking, but may vary with specific units), the separate neutral to the motor neutral and the green wire to the motor frame. For older 240V tools and motors that only use three of these four wires the white unused neutral wire should be carefully protected with a wire nut over the end to protect it from shorting.
There phase power adds an additional wire yet. These must only use approved (UL) receptacles and plugs rated for the amperage that your circuit will carry. Please also wire these as per your plug wiring diagrams.
In addition to grounding our motors, it is often desirable to ground our ducting and cyclones as the dust scraping around can generate a considerable static charge. Always only connect the green or bare ground wire directly to what you ground. Connecting any other wire can get you electrocuted. Specific grounding instructions for ducting are covered on my Ducting pages.
Always ensure your wiring is done by a competent certified electrician and that the work appropriately passes your local government inspections before use. - Switches Relays & Contactors
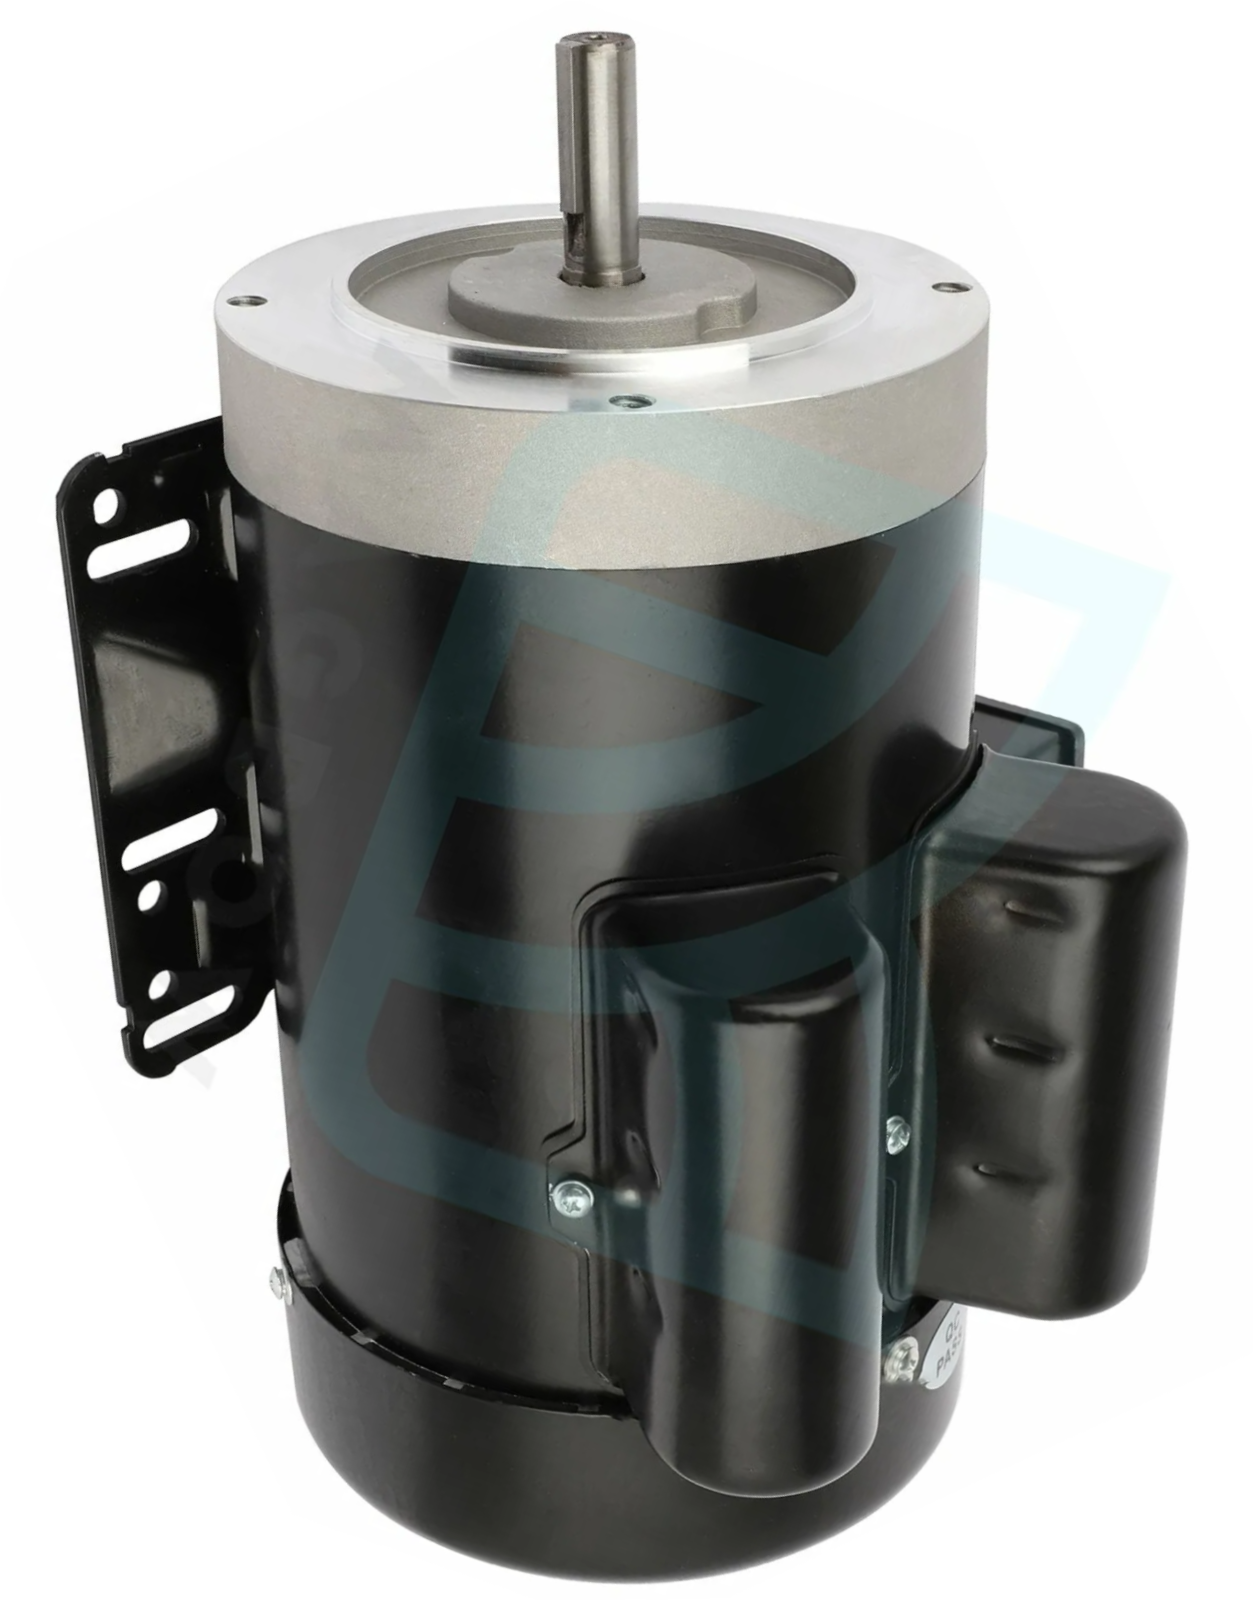
Every switch whether the simple light switches we use every day or the remotely controlled switches we like to use to turn on our dust collection and air cleaners must be carefully matched to carry the loads it will support. Most of our switches, like our home light switches are simple and set up just as needed. In the cases of our larger motors, we instead need to determine what kind of switch we need and ensure we get a set up with ample capacity. Use of an undersized or wrong switch can cause that switch to blow up and its contacts to weld in place causing the motor to burn up. For instance a 1.5 horsepower dust collector motor would within a matter of days ruin a standard light switch and possibly even start a fire as that switch burned up. We have to take the time to ensure that each of our switches is properly configured and heavy enough to handle what it is we want to control.
Larger motors require heavier wire and duty switches. These heavy duty switches are known as contactors. For motors in the 1-HP range and up, it is best to use a contactor that is designed for motors and has an amp rating high enough to handle the size of motor it controls.
To make sense of what we need for our motor contactors we need to know more about our motors.
When the switch closes meaning it lets the power go to the motor from our electrical source a voltage appears across the wires providing power to the motor's electrical wiring terminals.
An electric motor is simply a set of fixed electric magnets that surround a moveable electric magnet called an armature. When we apply current to a motor both the fixed windings and armature windings are powered to become strong electric magnets. By carefully choosing what fields are on and off, the motor will start to spin and then speed up to its normal operating speed measured in rotations per minute (RPM).
Getting power to the fixed electric magnets in a motor is easy, but getting power to the spinning armature is more difficult. Our two main classes of motors, universal and induction, use two different techniques for powering the armature.
Most of our smaller motors are universal motors where electrical contacts rub on contacts on the armature. The armature contacts known as a commutators are carefully engineered to ensure that power keeps pulling and pushing just right against the fixed magnets to get and keep the motor up to speed. The maximum speed of our motor pretty much depends on how many and how big the electric magnets we use. As our motors get bigger, they pull so much power that they can quickly cause the carbon brushes which power the armature to burn up. That means most universal motors are 1.5 horsepower and smaller.
Most of our larger motors such as used on most of our larger tools and dust collectors, instead use what are known as induction motors. Induction is the interesting process where a strong magnetic field can cause a current to flow in an unattached coil of wire. If that coil surrounds an iron core we again get an electric magnet. This means that the magnetic fields on the armature can be activated through induction without having to have an electrical connection. By carefully engineering the spacing on the various coils, our alternating current can cause the fields in an electric induction motor to turn at either 1720 RPM or 3450 RPM.
Unfortunately with induction motors all is so balanced when we first turn on our motor it will not start turning without help. This help is provided by a starting circuit. This circuit saves up power and a mechanical switch causes this power to be delivered just a little off to the coils generating enough electromagnetic push get the motor going. A switch that shuts off when the motor gets up to speed stop shifting the power causing the normal cycling of our current to keep the motor turning at its fixed speed. These starting circuits and switches are not needed for three phased motors, allowing them to be built for less money and run smoother. If this starting circuit fails to turn on an induction motor will just sit there and hum followed by burning up. Likewise, if the starting circuit fails to turn off, the motor will fight itself and eventually badly overheat then burn out. During this start up process the amperage draw can be 6 times higher than what the motor uses when working at normal speed. For instance a 1.5 horsepower motor that normally runs only drawing 15 amps can easily pull 90 amps during start up. This very high start up load for induction motors requires us to have a special switch that can both handle the running and start up loads.
As the motor begins turning, a reverse voltage is developed inside the winding that bucks the external supply voltage, reducing the effective voltage that can force current through the motor. The magnitude of the reverse voltage is also related to the amount of load on the motor, whether starting or running at full speed. The internal parts of the motor have no way of knowing whether the load is from an external load such as a blower impeller, or from the mass of the motor's own armature as it is being accelerated to full operating speed. If the motor has a light-weight armature and the external load is small, the motor comes up to speed very rapidly, and the start-up inrush of current drops very rapidly from its initial surge to a normal, sometimes minimal, idling current. For example, a table saw or radial arm saw starts slowly or quickly, depending on the weight and power of the motor, but once it is up to speed, it draws very little power until you start cutting. If you start a heavy cut, you might notice the lights dimming a little bit as you push the work into the blade. That is caused by the heavier load causing the internal back-voltage in the motor to drop, allowing the external incoming-power voltage to force more current through the winding, thus delivering more power to the windings so they can apply more torque to the load in order to maintain speed.
When a motor is operating at full speed and full power, there is a lot of energy stored in the magnetic fields and the magnetic materials inside the motor, as well as a lot of kinetic energy stored in the physical mass of the armature. When you shut off the motor, that energy has to be dissipated, either through friction or external loads. When a motor gets turned off, these quickly spinning coils turn that motor into a generator and can create a considerable reverse or what is known as a back voltage. That back voltage can ruin motor starting circuits and ruin digital equipment we have plugged into our home when that surge hits our power box.
When the circuit is interrupted, whether by an overload switch, an upstream circuit breaker, or by the operator switching the power off, the contact surfaces in the switch or breaker separate. As soon as they separate, current ceases flowing and the voltage rises to a very high level in an attempt to keep it moving. As the voltage rises, if the contacts are too small or don't separate quickly enough, the voltage creates a plasma by ionizing the air between the contacts, turning them into what is essentially an arc welder. This plasma is typically called a spark because if the switch is big enough, it quickly extinguishes, and the current stops flowing completely. From that point on, the motor keeps turning until the magnetic fields finish collapsing and the armature's rotational kinetic energy is dissipated as heat into the air, the bearings, or into the external load.
- Magnetic Relay Contactors
The most common type of electrical contactor used with induction motors is known as a magnetic relay because it uses powerful electromagnets to open and close the points very quickly with minimal bounce. These electric magnets are generally powered by a small transformer, such as we use with our doorbells. Turning on the transformer powers the electromagnets in the connector quickly closing the points. Turning off the transformer cuts the power and powerful springs immediately open the points cutting off power to our motor. Both the strong springs and points in these kinds of contactors will eventually fail requiring contactor replacement.
- Solid State Contactors
Solid-state technologies have produced many new devices that are capable of switching high currents and high voltages without need of either the points or springs. These solid state switches are built with special circuits that also prevent bouncing and the high back voltages created when a motor is turned off. Unfortunately, these units remain pretty costly, so most instead choose to simply use magnetic relay type contactors.
- ContactorRatings
Regardless of type a contactor must have high enough current and voltage ratings to handle the motor it controls. All manufacturers of motor-rated contactors publish data regarding the device's capacity, and it is usually also present on the device itself. Usually the label will show what horsepower size the device can handle for 1-phase and 3-phase operation, if it is rated for both, and for both 120-volt and 240-volt operation if it is designed for such operation.
Typically, the horsepower rating of a given device is higher for 3-phase power than single-phase because the currents are significantly lower, so a contactor that is adequate for a 5-HP, 3-phase motor is rated for only 3 HP, single-phase. Using an undersized contactor can result in the contactor blowing up You can use a contactor with a higher rating. For instance, you can safely use a contactor rated for 7-1/2 HP on a 5 HP motor, but using that same contactor on a 10 HP motor risks the contactor exploding.
- Motor Overload Protection
Electric motors are designed to run safely at full power (assuming the motor isn't a cheap import that is sold for a cheap price but is completely unsuited for running at full power, full time). However, they are also usually designed to operate at relatively high temperatures in order to keep the package size small, due to competitive issues. That means they get hot inside, and if they get overloaded or the ventilation gets plugged up, or something else, such as an overload, happens to cause them to overheat, they can quickly get too hot for the internal insulation, causing it to melt, leading to a shorted winding followed by the motor burning up.
Another problem is motors generate a lot of heat when they are starting. If a big motor is turned on and off faster than that heat can be blown way by the motor cooling fan, the motor can melt its internal insulation followed by a burned up motor. This problem is so bad with cheap import motors that many motor experts recommend taking these motors when new to a motor shop and having them dipped to improve their insulation. A better idea is to from the onset buy a better motor. Motor insulation is rated and motors with E and F ratings are all we should consider for use with our blower motors because of the very high start up and running currents. This start up heat can be addressed by using a soft-start controller that limits starting current, using larger motors that do not build up so much heat during start up, buying special motors, or simply reducing how often we start and stop our motors. The top U.S. motor makers are clear for maximum motor life we should not turn on and off our 1 hp and larger induction motors more than 4 to 6 times an hour.
Blowers use heavy impellers that can handle hits from whatever we suck up. Bringing a heavy impeller up to speed takes lots of power and generates huge amounts of heat. Worse, when up to speed a blower motor is working at near full capacity so the heat has little chance to cool. The problem is our impellers create lost of air resistance when spinning and that resistance pushes the motors right to and frequently past their limits. This problem is so bad that almost all reputable small shop vendors intentionally use small ports on their blower inlets and outlets to keep the motors from badly overheating then failing. - Overload Protection Types
Once the motor is chosen and the proper contactor selected for that motor, the contactor must have a matching, compatible over-current/overload shut down controller. Overload-protection devices generally use some combination of methods to detect overload and overheating conditions:
Resistive-heater over-current detection
Magnetic over-current detection
Thermostatic over-temperature detection
- Resistive Heaters
In simple English resistive heaters trip a switch that turns off the current to the transformer which controls our contactor when a motor gets too hot. It took me a while to translate that from my motor engineer who said it a little differently:
"This method of protection consists of placing a small-resistance, high-current-capable heating element in series with each leg on a 3-phase motor, or just one leg of a single-phase motor. As current passes through the heater, the temperature of the wire rises due to generation of heat. The heat generated, in watts, is equal to the resistance of the heater in ohms multiplied by the current, in amperes, squared. The heater is usually wound into a coil shape that wraps around a metal post that contains a bi-metallic thermostat mechanism. When the temperature of the resistor exceeds a pre-determined level, the bi-metallic mechanism causes a catch to be released that then allows the electrical contacts in the overload controller to shut down the power to the motor or to the contactor relay that provides power to the motor itself."
"Moreover, if the over-current circuit trips and disables the contactor, it must be manually reset before power can again be applied to the motor. This is usually accomplished by pressing on a reset button that pushes the contact mechanism on the overload protector back to the engaged position where the thermostat mechanism can hold the contacts in their engaged position until another over-current condition causes it to trip. Note that on 3-phase overload protectors, an over-current condition in any one of the three wires to the motor causes power to be disconnected to all three wires because the three poles of the contactor/overload-controller are interconnected so that they operate simultaneously." - Magnetic Over Current Shut Down Devices
Magnetic overload protectors sense the current going through the wires to the motor by means of the magnetic field that always builds up around any wire carrying electrical current. When that field gets too high the power to the transformer that powers the contactor is cut.
- Over Temperature Switches
A thermally activated switch inside the motor also cuts the power to the contactor transformer again cutting off power.
- Safety Concerns
- Automatic Reset Restart
Many motor overload shut-down protections automatically reset when the current or temperature is back to normal. This means our motors can start when we are not expecting them to do so. Most tools can be very dangerous and cause serious injury if started when you are working on them. For instance having a power saw start on its own while changing a blade can cause injury or even death. This is another reason why we should always unplug your tools before doing any operations where their running could cause injury.
- Magnetic Switches
Because of this same problem, it is always a good idea to equip all shop tools that use induction motors regardless of motor size with magnetic starter switches. When a tool turns off or the power drops regardless of reason, these magnetic starter switches kill the power. Should the power come right back on or the tool protections reset, the switch keeps the power off until you again turn on that switch.
- Automatic Reset Restart
- Disclaimer
All this means is we need contactors able to handle both the starting current load, the ongoing load of the motor while running, and prevent that large back surge when the motor is turned off. Because we get a powerful spark when dealing with this much power, the electrical contacts known as points must be made of very tough material and kept wide apart when we do not want the current to flow. To keep from burning up our contactor we need to very rapidly open and close the points. The points need to open and close with no bounce, as any bounce would again create electrical arcing and quickly burn them up. These points must also break open very quickly and cleanly to minimize and back surges. Clearly building a contactor that can quickly open and close, does not bounce, and will handle the high currents for a motor requires some careful engineering. That makes contactors expensive. The good news is that engineering has long been done so we only have buy a motor contactor with ample capacity and that is of a type to meet our need.