Cyclone Building Instructions
- Instructions
These instructions presume little to no sheet metal skills and a minimum of tools. Over 10,000 small shop owners use cyclones of my design and at least 6000 built their cyclones from these plans and building instructions. You can build one of these cyclones if you patiently take your time and follow the instructions. Please read the Cyclone Plan page before starting on building your own cyclone so you understand more about this system.
Most thumbnail pictures on this page become full sized pictures when clicked. This lets the page load faster for those with slow connections.
- Introduction
We have over seventy years of chip collection science and at least thirty years of professional fine dust collection science define the minimums we need for good dust collection.
Since the 1920s fire marshal and building codes required good chip collection in most industrial facilities, so chip collection remains well understood. Chip collection means picking up the sawdust and chips that we would otherwise sweep up with a broom. Good chip collection requires enough air speed to pick up the dust and chip, enough air speed to keep that material moving through our ducts, and enough air volume to accommodate the volumes of dust and chips each different size and type of machine produces. Decades of applied science and practical experience helped the major dust collection firms build tables that show exactly how much airspeed and air volume we need to collect the different materials. For woodworking these tables show we need to maintain a target air speed of at least 3800 feet per minute (FPM) airspeed to suck up the chips and keep vertical duct runs from plugging. To provide a little safety factor most woodworking dust collection engineers design their systems with at least a 4000 FPM airspeed. Also, we need at least 2800 FPM airspeed to keep horizontal ducting runs from plugging. Finally, most small shop stationary tools require at least 350 cubic feet per minute (CFM) airflow to pull in the volumes of dust and chips they produce.
At least thirty more years experience by those firms who guarantee customer air quality also establish well tested fine dust collection minimums. We need the same 4000 FPM airspeed for pickup and to keep our vertical ducts from plugging. Likewise we need that same 2800 FPM to keep our horizontal ducts from building up dust piles. The major difference between good fine dust collection and chip collection is we need to move far more air, roughly 1000 CFM to get good fine dust collection at our typical small shop stationary tools.
At first this requirement to move nearly three times as much air makes no sense because we all know that the slightest breeze will blow dust highlighted in a beam of sunlight. I often ask people to wet a finger and see how far away from their lips they can feel blown air versus how far they can detect sucked air. We can feel the blown air as far as we can reach, but can only feel sucked air when our finger is right next to our lips. Likewise, our shop vacuums only pickup right next to the end of the nozzle. The reason is sucked air comes from all directions at once and blown air hangs together for quite a distance before it disperses. Because airspeed falls at roughly twelve times the distance squared, we lose the airspeed we need to pull in the fine dust before normal room air currents blow it away unless we move lots of air or totally contain all the dust as it is being made. Most tools even with upgraded hoods provide such poor containment we must move more air. This is why good fine dust collection requires that we move about 1000 CFM of airflow. Careful testing shows that reducing that airflow to 900 CFM ends up with five times more airborne dust. Reducing to 800 CFM lets fifty times more airborne dust escape collection and airflow below 800 CFM results in such poor fine dust collection that shops subject to inspection would immediately be shut down due to dangerously high airborne dust levels.
We need to understand wood dust causes a variety of immediate health problems and some long term adverse health effects. Wood gets much of its strength from silica better known as glass. When looked at through an electron microscope wood strongly resembles bundles of hollow mostly glass rods stuck together with organic products. Think about what would happen if you glued a bunch of glass tubes together then slammed a machete to cut through that bundle. You would end up with a fairly clean looking cut but would also generate lots of tiny broken pieces of glass. This at a microscopic level is exactly what happens even when we hand plane what appears to be a near perfect curled shaving. A particle meter shows that hand plane generates a large amount of fine invisible dust. These too small to see without magnification particles slip by our bodies' natural protections. Then depending upon size these sharp barbed particles lodge at different places in our respiratory tissues where they cut and tear our tissues. As a result the peer reviewed medical studies show every fine dust exposure causes a measurable loss in respiratory capacity and some of this loss becomes permanent. Although our bodies come with more than double the capacity we need for most things, over time the accumulated loss worsens a wide variety of other health problems, particularly other age related and respiratory diseases. Insurance companies used to share on the Internet their data that show 100% of commercial woodworkers suffer at least a 50% loss in respiratory capacity from their woodworking careers. This is particularly bad news for small shop and hobbyist woodworkers because the insurance data is for larger facilities that almost always vent their fine dust outside. Typical small shops that instead vent their dust collection inside average about 10,000 times higher airborne particle levels. Although private industry spent fortunes to prove that wood dust poses no major health risks, the reality shown by peer reviewed medical studies is that any woodworker who does not protect themselves will experience trouble, often in their later years of life.
All fine dusts pose so much health risks that the EPA sets standards of no more than 1.5 micrograms per cubic meter. Translated, less than two tiny thimblefuls of the fine invisible dust will cause a large two car garage sized shop to fail an EPA air quality test. The medical experts know fine dust poses so much health risk that they recommend an even tougher standard of only 1.0 micrograms per cubic meter of air. Just slapping our denim shop apron launches enough of this fine dust to fail either an EPA or medical air quality test. Believe it or not, hand sawing just seven inches of 3/4" wood will cause a large two-car garage sized shop to fail these air quality standards.
Sadly, most even clean looking shops fail their air quality tests due to a buildup of residual dust. Residual dust consists of that dust either missed during collection or with particle sizes so fine it passes right through our dust collector and cyclone filters. The high silica content in wood dust means this dust lasts a long time. In fact, when a few of the sealed pyramids were opened researchers found considerable wood dust that still lingered settled on every surface. Almost any airflow launches these invisible residual dust particles over and over. As a result, most small shops that vent their dust collectors and cyclones inside build huge amounts of residual dust then just about any activity in our shops launches this dust over and over. Strangely, one of the worst stores for this dust is our so called fine filters. Most filters are open enough that the fine dust accumulates in the filters, so when we first turn on our dust collectors or cyclones the initial blast of air blows lots of this fine dust right through our filters. Moreover most filters use spun polyester fibers which build up a strong static charge from the air flowing over the filter strands. When we turn off our blowers this high static charge attracts lots of fine particles. My certified air quality inspection showed my clean shop immediately failed as soon as we turned on my cyclone before we did any woodworking. That dust came from the surface and inside of the filter pores.
The medical experts strongly recommend that vent the fine dust outside and if we have to filter that we use filters that separate down to at least 0.5-microns. These are really fine filters because there are one million microns in a meter and a coarse human hair is only about 100-microns thick. Our eyes normally can only see down to about 10-micron particles without magnification.
The problem with such fine filters is that when we provide the minimum of one square foot of filter area for every 4 CFM of airflow, woodworking makes so much fine dust that our filters will clog after about twenty minutes of woodworking. Worse, cleaning rapidly ruins these fine filters which in most commercial facilities need replaced roughly every three months. At a cost of over $250 a set for a small shop, few would be happy if they have to constantly clean and replace these expensive filters. Pre-filters work, but they again require lots of cleaning so most commercial facilities instead use much more open filters that they vent directly outside where the airborne dust blows away.
Sadly, most small shop vendors choose to use this same very open outdoor filter material on their dust collectors and cyclones they sell for indoor use. Many of these vendors carefully pick their filtering material so it just gets rid of the visible dust and freely passes the unhealthiest invisible dust right through. So much dust gets passed through that most small shops build up such high amounts of fine invisible dust that just walking through the shop without doing any woodworking launches enough airborne dust to fail an EPA or medical air quality test. At these exposure levels all suffer both short and long term respiratory damage. And this causes a big problem because adding fine enough filters to existing dust collectors and cyclones simply clogs and quickly ruins the filters. Existing gravity based cyclones separates off almost all of the visible dust by weight which keeps our filters from quickly clogging with larger chips, but still results in fine filters plugging roughly every few hours of use. That makes for a constant cleaning problem and need to frequently replace fine filters. Most don't replace their fine filters because they cannot see or measure the fine dust. I invented my cyclone design to also separate off 90% of all the fine airborne dust that other cyclones send right into the filters. As a result people have been using my cyclone without harming their fine filters for more than ten years versus needing to replace them quarterly with other designs. - Sizing
Small shop vendors foolishly convinced most that cyclone performance is measured in CFM when the reality is cyclones get rated according to how well they separate and blowers get rated based on how much air they move.
As discussed on the Cyclone Plan page the cyclone proportions and sizing depends upon the weight and density of the material to be separated, the needed airspeed, the needed collection air volume, and the size of the blower used to power our cyclone. Hundreds of credible independent tests done by scientists, engineers and medical researchers show my 18" diameter cyclone with a 1.64 cone ratio provides the best possible small woodworking shop fine dust separation in a cyclone that just fits under an 8 foot tall ceiling. This sized cyclone works with blowers as small as 1.5 hp, but that sized blower will not power a cyclone, filters, ducting, and tool hoods and move the 1000 CFM we need at our stationary tools for good fine dust collection. To move enough air with that overhead we really need a 14" diameter or larger impeller turned at 3450 RPM by at least a 3.5 hp motor. Cyclones that don't use my more efficient design need at least 4 hp motors to move the same amount of air. Motors typically come in either 3 or 5 hp sizes, so I recommend spending the little extra to get a real 5 hp motor as it makes no sense to me to pick an undersized or poor quality motor for the most heavily used motor in your shop. A 14" impeller only uses a maximum of about 3.5 hp, leaving an extra 1.5 hp capacity which lets us comfortably power a 15" diameter impeller and even a 16" diameter impeller if we test carefully and limit the airflow a bit so we don't draw too many amps from our motor. At least 6,000 people worldwide now use my cyclone and get great fine dust collection using 14" impellers on 5 hp motors. I prefer a larger 15" impeller because the extra airflow gives more flexibility and is more forgiving. With some careful tuning that same 5 hp motor can power a 16" impeller for maximum airflow bragging rights, but if improperly tuned the result can try to move so much air it will burn up a 5 hp motor. - Materials
Before starting you should decide on the material for your cyclone. People have made my cyclone design from many materials. A few started with cutting up 55-gallon drums. Some used bendable plywood. One used graphite fiber. Another used vinyl floor covering. Some use fine hardware cloth (wire mesh) that they then coat with fiberglass, epoxy, or even spray with truck bed liner. One even made his cyclone out of concrete on a fine steel mesh. I even made one out of large PVC pipe. Clear Vue Cyclones made the prettiest from clear high impact plastic. With plastic being slicker than metal, it does a better job of separation, but can build up static charges.
You should pick a material for your cyclone that is easy to work and that you can protect from constant sand blasting. Many woods have a high silica content better known as glass or sand. When wood dust slams into the cyclone it releases moisture and generates heat. Blasting the inside of a cyclone with this damp hot sand causes many commercial cyclones to rust and wear through right at the point where the incoming air hits the outer cylinder wall. You should protect that first contact point with a rubber sheet or coating like truck bed spray on liner.
Most find galvanized sheet metal provides the easiest fastest way to build my cyclone design. Many make their cyclones out of typical 30-gauge thin galvanized sheet metal used to make HVAC duct. If you use this thinner metal you need to build support rings to keep the upper cylinder from collapsing. Also, your inlet will make a pop or bump sound when you turn your cyclone on or off. Most find 24-gauge galvanized steel works well without needing extra support. - Timing
Building your own galvanized metal cyclone from scratch takes about twenty hours of metal layout, cutting, and forming followed by about ten five of propane torch soldering. Someone experienced with a sheet metal brake, slip roller, and beading machine can cut the forming time to a few hours. A commercial ducting shop with powered sheet metal tools can typically cut and build one of these cyclones from the cut metal in a few hours which is why many have these cyclones built for them at metal shops. You then still must either solder or use duct sealant.
- Approach
Building a cyclone that easily goes together with good fitting parts requires:
Plan - You must start with a well tested plan with accurate dimensions such as provided by my cyclone spreadsheet, or use a precut metal kit.
Poster Board Full Sized Model - If you lack sheet metal experience make a full sized cyclone from poster board, cardboard and masking tape. Even if you have a precut metal kit, first trace all the parts onto poster board and build a full sized cyclone model. Far too many people write saying they omitted the poster board step resulting in messing up parts, transferring dimensions wrong, leave off tabs, etc. that wasted metal and time. Most find if they make a poster board model they save considerable time overall and often avoid remake of a few parts.
This model ensures all gets laid out correctly, help you figure out all the different parts, teaches you how to gently work the metal to keep all round so the pieces fit well, helps you to refine your forming technique to avoid wrinkles and unnecessary bends, and for those who don't start with a precut kit the poster board provides a template for you to trace to ensure you layout and cut your metal correctly the first time. It took taping a couple of sheets together to make the cone and again two sheets to make the upper cylinder. Accurately cut out that poster board. Then carefully work out your technique to form the rounded cyclone parts and fold the rectangular inlet without any wrinkles and unnecessary bends. Also make two thicker cardboard rings that match your cyclone wooden top. One of these rings goes into the cyclone top and the other just above the cone to hold all round. Assemble the parts using masking tape. After your full sized cyclone fits well those who cut their cyclones get to use these templates to make your cyclone metal and wooden parts.Template Rings - Just like the round cardboard rings that held the model round, this sheet metal cyclone depends on use of carefully made wooden template rings to ensure all comes out the right size, that all the round parts stay round, and that all will fit together. Those who do not use template rings during inlet, cone, and air ramp installation and soldering invariably end up with junk having to start over because they either cannot install the cyclone top or mate the cone. These sizing rings also help you avoid problems making joints in the wrong places. You need two round 18" diameter rings to help size and keep the upper cylinder and top of the cone round. These rings keep the upper cylinder from warping or going out of round while installing the inlet, air ramp, and cone. One of the two 18" rings becomes the cyclone top which holds the internal cyclone outlet cylinder and lets you mount the cyclone to the blower. A pair of 9" diameter rings ensures your air outlet cylinder gets sized correctly and stays round. A 6" disc gets used to keep the cyclone dust chute, the cyclone inlet transition, and the blower outlet transitions round. This same 6" ring later serves as a plug to check our cyclone for leaks.
Cleaning - You need to remove the very thin coat of rolling and storage oil that manufactures use to coat sheet metal. If you do not remove that coating your solder and polyurethane sealant will not stick and building your cyclone will create a mess. I found a thorough cleaning with lacquer thinner outside works well.
Forming - After years of building these kits I learned that good initial metal forming remains the secret to cyclones that go together easily. The lightest clamp pressure on a well aligned and formed joint holds all perfectly. A poorly formed joint will almost never go together easily and requires way too much sealant or solder. You need to use a slip roll or slowly hand form all the round pieces over a 4" PVC pipe making sure you don't get bends. Also you need a jig or brake to get the crisp even bends needed for the inlet. For the best joints patiently hand work the metal carefully until each joint fits without a need for claming. As slow as this forming seems it saves considerable time and frustration.
Metal Seams - My plans and kit designs allow different approaches to make the metal seams. You may either overlap the 3/8" wide tabs on each side of every joint or bend them at 90 degrees. Making the bent seams is easy and you can hide those seams with U-shaped automotive door trim, but most choose to make overlapped joints that look nicer from the outside. Most hide the seams by putting them at the back of the cyclone. If you make overlapped joints, remember my plans use tabs on both sides, so you need properly overlap the tabs. The sizing rings ensure proper sizing and joint overlap alignment.
Joining the top cylinder to the cone and cone to the dust chute requires wooden rings, bent over tabs, or find a sheet metal shop that can roll a lip. I think bending over tabs is the easiest and ends up with the best looking result.Fastening Seams - Going from easiest to hardest, you can use solder, a spot welder, screws, pop-rivets, regular rivets, brazing, welding or a seamer to make the joints. An expensive seam machine makes joints similar to those that seal food cans. Each joint type requires different skills and tools. I think soldering with a propone torch works best and makes the nicest looking finished unit. I've made units with a MIG welder, spot welder, screws, pop-rivets, and solder. My design is optimized for solder but works well with either screws or pop rivets. Here are some of the approaches in order of preference and nicest finished result that you can use to build this cyclone:
Soldering:
I prefer soldering because it quickly makes the best looking and strongest cyclone and requires only an inexpensive propane torch. I strongly recommend you do enough practice to decide if soldering will work for you. Also, if you have not done quite a bit of metal soldering, it is well worth your time to read over the below "Soldering 101" instructions. If soldering is not your thing, then go to the pop-rivet or screw type construction with polyurethane caulk. Either will serve you well.
One of the biggest problems with soldering today gets caused by solder that will not stick. Local "box" store plumber's solder and flux will not stick well to the normal special metals and coatings on today's galvanized metals that can self-heal from small scratches. You need a lead based solder, preferably one with a small silver content and the right flux. I get excellent soldering with a solder that contains 50% lead, 48% tin and 2% silver but any 50% lead tin mixed solder works well. Only the All-State Welding Alloys, Co. Duzall flux of the dozens of different fluxes I tried consistently works well to solder today's galvanized metals. A 4 oz. bottle provides ample flux to build a whole cyclone, but I buy this flux in 16 oz. bottles because with shipping the cost is nearly the same for four times as much. Only one of my many local welding supply outlets carries this flux, so I bought on-line from www.weldingsupply.com.
Caution: Zinc, which is used often with other alloys like cadmium to galvanize steel is toxic when heated to a vapor and so is the lead in our lead based solders, so you need to work in a well-ventilated area and wear gloves. I prefer to do my soldering outside with a mild wind blowing or using a fan to blow across the work to minimize my exposure.Seamer:
The fastest way to build this cyclone simply lets a local sheet metal firm do the build. They use powered rollers, brakes, and seam forming machines that let them make one of these cyclones quickly. Most use the very light 30-gauge metal instead of the at least 24-gauge metal I prefer. In 2000 my local firm charged me $75 to roll all the metal and then make every joint except the air ramp. In 2010 this same firm now charges $250 for this same work. My firm was kind enough to let me watch. I thought I was pretty good at building cyclones because I had made a few. They badly put me to shame. Their entire effort took less than an hour and left a pristine near perfect looking cyclone. Their eight foot long power roller rolled all nice and round including a perfectly tapered cone. Their LockFormer machine made snap-lock joints for all the straight edges. They also had a special seamer that made the cyclone center joint between the cone and cyclone top, sealed the inlet to the outer cylinder, plus it put the rings on the bottom of the cyclone and both transitions. To use these machines I had to make all the tabs grow from the 3/8" in my plans to a full 3/4". My metal workers advised that there are quite a few different joints and levels of these joint forming machines, most of which require different length tabs, so check before cutting any metal to be used with automated seaming equipment. All of these joints still required being sealed with solder or a polyurethane duct sealant.Screws & Pop-Rivets:
The easiest homemade way to build this cyclone is to use screws or pop-rivets then use polyurethane duct sealant. Although screws and pop rivets work well, are easy, and do not require a lot of practice or special tools, they much such an ugly looking cyclone I don't recommend either. You can screw or pop-rivet the outer cylinder, the cone, the cone-to-cone outlet, and the air inlet. I've left plenty of material so you have room to drill and install pop-rivets or screws. With screws you need to drill a larger outer hole and smaller inner hole. Hand tightening the screws will then pull the inner metal tightly to the outer. You still end up having to grind off the screws inside the cyclone to keep strings and shavings from hanging up on the screw threads that stick inside the cyclone, so I prefer using pop-rivets. You can special order near flat headed tiny pop-rivets which almost totally vanish on both the inside and out. Rivets and screws require polyurethane duct sealant as they don't solder well at all.
Making the screw or pop rivet holes takes some work. Drill 1/8" holes spaced one inch apart on one side to be joined. Then clamp the joint tightly exactly as it will sit and use those screw holes to drill through the other side of the joint. If you do not use this technique you will often get bad wrinkles in the metal and this is the only way I know to ensure hand drilled holes line up. If you are using screws then drill the outside joint holes a bit larger so hand tightening pulls the joint together. After all the holes are drilled run a bead of flexible polyurethane gutter and flashing caulk on one side of the joint. Clamp the pieces together in the proper alignment tightly on the form rings. Then install the rivets or screws. I used to recommend putting the screw heads inside, but that left insufficient room for good access. Instead put the screws in from the outside then grind off the points later. For the pop rivets put the head inside which means you have to put in your riveting tool inside which is a little cramped. After securing and the sealant dries, put a piece of heavy aluminum duct tape over the inside of each joint. This makes a cleaner joint in terms of less air resistance. Using screws and pop rivets makes for an uglier cyclone exterior, but where it counts is on the inside. There we need as smooth and flush surfaces as we can get. Automotive door edge trim will snap right over the tops of longer rivet heads it you want to dress them up some.Spot Welding:
One of the nicest ways to build the cyclone is to use a spot welder like we use to build our cyclones then solder all the joints. You can buy a used Miller tong type spot welder on eBay for about $200 or get a new one from Harbor Freight for about $160 on sale. The Miller 18" tongs fit either unit and you need a set of these for roughly $90 to reach in deep enough to weld the cone. Some woodworking clubs held cyclone building sessions where they went together to buy or rent a spot welder. It takes some practice unless you get a welder that lets you setup an automatic weld to ensure the spots go deep enough without burning through, but these produce quick, strong good looking welds. Again you will need to seal the joints. Some use sealant or aluminum duct tape inside. I use solder.MIG Welding:
Another technique uses a wire fed MIG welder with either light or heavy sheet metal construction. Again, I do not have the skills to teach that type of metal working, and most do not access to an appropriate welder. The technique I used with my MIG welder was to make holes in the outer side, clamp the joint together tightly then simply fill each hole with weld. For good looking joints you then need to grind the weld flat. You also must seal the joints with sealant or solder.TIG Welding:
A few friends have built my cyclone design from 16 to 18 gauge metal then used a TIG welder to make very strong welded joints. This welding omits the tabs, holds the two pieces of metal perfectly together, then uses an electric arc to melt the metal pieces together. I don't have a TIG welder nor the jigs needed to hold the metal perfectly fitted and held flat on a welding surface. The one local firm with this equipment charges $80 an hour which comes to about $400 to weld up one of these cyclones. This is clearly the way to go if you are building a very heavy larger commercial unit, but not affordable or practical for most small shop cyclones. Careful MIG welding does an equally fine job and is used on at least one commercial hobbyist cyclone. Like MIG welding, you still must grind and sometimes seal. Most small shop vendors make their cyclones using either spot welding, MIG welding, or TIG welding.Laser Welding:
Finally and perhaps the most elegant way to build a cyclone with the nicest joints uses 16 to 18 gauge metal, a professional heavy sheet metal fabrication plant, and all laser welded seams and joints. My local cost for this laser welding came to $1200 including the metal. The results are beautiful but a bit overboard. Careful spot or MIG welding does an equally fine job.
Clamping:
We must hold the joints together for solder or welding. Use good metal forming to make your joints. If you force clamps to hold all together then you need lots of clamps, plus as you heat the joint the metal it warps and goes all over the place. Solder when melted is thinner than alcohol so it will pour right out of any poorly made joint. If your metal pieces don't quite yet fit then keep forming. All must fit before clamping and soldering. Below are the different approaches to clamping. The only two clamping techniques that worked well for me were sheet metal screws and spot welding.Spot Welding:
Other than going to a sheet metal shop that has powered seam making equipment we found a spot or MIG welder is the fastest way to hold our joints together tightly in preparation for soldering. I prefer a spot welder, but found that by drilling holes on just the outside of our joint, clamping the whole joint together, then a light touch with the MIG left a nice weld that held all together well for later soldering. I found my MIG just does not have the temperature range to be good at welding thin galvanized steel, plus put out a lot of very toxic smoke so required me to be in my welding helmet with its built in respirator. A spot welder saves a lot of time drilling and putting in either screws, rivets or other types of fasteners without the large amounts of toxic fumes. My son and I still make a few cyclones for friends and we use a spot welder then solder. We prepare each joint with metal cleaning acid flux, tin both sides of the joint with solder, use 1/2" HVAC worm drive stainless metal duct clamps to hold each piece solidly to its wooden form, then using a spot welder with the long tong arms weld going from the center out to avoid wrinkles. We then solder the joint making for a good airtight seal.Regular Sheet Metal Screws:
I found using Phillips head sheet metal screws makes it much easier to remove them later to fill the holes with solder. As with the self-starting sheet metal screws drill the top piece of metal with a hole larger than the threads and then drill a small starter hole in the bottom piece. These sheet metal screws work better than the self-starting sheet metal screws because they have a much bigger taper that will really pull that bottom piece tightly to the top before stripping. The secret to removing the screws after soldering is to ensure you do not solder over the heads. Lightly heat them while your screwdriver is applying pressure. When they give stop the heat and unscrew them.Big Jig:
I had so much solder leak through on some prior efforts that I came up with a jig to hold the metal tightly together without holes! This is way too much work unless you were to make a lot of cyclones. A jig works well until you do something stupid like me and loan the jig out and it never comes home. I made my jig from two pieces of heavy angle iron with one flipped opposite the other. I clamped them together with about 3/8" overlap, then drilled and tapped for 3/16" bolts. On the ends I put in 1/4-20 bolts with spacers to hold the two pieces together in alignment. These end screws keep all the other screws aligned opposite each other and hold the two pieces of angle iron off the metal. I used surplus stainless steel thumbscrews because the stainless does not conduct the heat away from the joints like steel welding clamps do. Stainless is a natural insulator, so the screws do not act as heat sinks, plus most solder will not stick to these screws.
Use is fairly easy. Use a straight edge and extend all the thumbscrews about ¼" to make an even row. Put the angle iron over the joint to be soldered, tighten the 1/4-20 end bolts firmly on their spacer, then lightly tighten the thumbscrews starting from the center working outward. Again, having a joint that already fits tightly is critical as these are not going to pull a poorly made joint together. They only hold the joint together for soldering. The stainless screws act just like pop-rivets or your sheet metal screws in terms of pulling all the joints together tight with no holes to fill. At first I tried a 4" to 5" spacing, but found screws every inch works far better. If you were going to make a few of these and have no access to a spot welder, making a jig is well worth the trouble and you will spend less time making the jig than filling and sanding holes with solder.Metal Welding Clamps:
Like most woodworking, the key to good joints is making sure the joints fit right on instead of trying to force things by using heavy clamps. Unless you know what you are doing, using the long vise-grip type metal welding clamps creates nothing but an ugly mess of dented up metal and poor solder joints. The clamps are too much of a heat sink making it impossible to get solder around them without constantly changing clamp position or running a torch way too hot which will burn off and melt the galvanizing. They require a gentle touch or using homemade aluminum clamping pads to clamp without using so much force that the clamps bend or dent the metal. These clamps are also are so heavy that their weight alone will bend the metal if the clamp weight is not supported. To make these types of clamps work, you need at least three long reach clamps, each with the wide articulated pad that provides a flat clamping surface instead of the rounded point type clamps plus aluminum pads to spread the clamping pressure down our joints instead of in a small circle. I made up my own clamps with 3" wide long pads. For those who use normal clamps, I found separating these clamps by about 1" is ideal, so instead of a few we end up needing more than a dozen. You can "leap frog" the clamping by starting at the center then using two pairs of clamps working outward. Secure the area between two clamps, then move one clamp outward and secure the new area. If soldering we end up having to heat the whole area including the clamp enough to get the solder to flow. This is a pain and can easily cause burns if you are not real careful when moving the clamps. When using clamps we are also relying on them to provide a bit of a heat sink. This means that as we heat up the next area our clamp is going to keep the just soldered area from getting so hot the solder melts there too. Anyhow, unless you carefully formed the joint to be tight and only use low slow heat when soldering, the metal will warp, you will "un-solder" previously soldered areas, and . Most end up putting in screws every 1", soldering, then removing the screws and with the clamp to act as a heat sink patching the holes. I personally use a spot welder rather than either clamps or screws to try and hold all together.Temporary rivets:
I tried what many others do following the Wood Magazine plan using aluminum (not steel) pop rivets to do the holding while soldering. They work ok, but not well. Drilling them out after is a real pain because the metal that flares the rivets spins unless you use something like Vise-Grip pliers, plus that metal shaft is so much tougher than the rivet body, you often end up drilling through the side of the rivet into the cyclone metal.Cleco fasteners:
In the aerospace industry aluminum sheet gets held together ready to rivet with temporary Cleco fasteners. These have barbed tips that slip through the rivet hole and grab the bottom piece of metal. A strong spring then pulls that bottom piece tight to the top. You can purchase Cleco fasteners and the special pliers needed to compress their spring to set them. Unfortunately, you risk ruining your fasteners if you get solder on them. I liked how well mine worked, but finally gave up on these after ruining too many fasteners. You can buy these from the Air Tool Store (see my links pages for ordering details)Self-Starting Sheet Metal Screws:
I even tried self starting 3/8" long sheet metal screws. These screws are built to be driven into sheet metal by a drill driver and will strip out easily. Although these screws work well for many applications, they cost a bit more and did not pull the metal together tight enough for good solder joints. The only way I found to make them pull the metal tight enough together for soldering was to pre-drill a hole larger than their threads on the top piece of metal. Then use a drill to drive the screw into the lower piece of metal stopping before the screw pulls in. Finish by hand with gently pulling the pieces tight and not stripping the metal. With that much work, it was cheaper, easier and much faster to use a single sized hole and pop rivets.
Soldering Heat Source: Soldering works best with a propane torch with the blue part of the flame set at a maximum of about 1/2". You can solder with bigger flame or a MAPP gas torch, but don't follow my early lead and use your torch on too high as you will badly warp your metal and burn the galvanizing off which releases some pretty toxic gas. I found even my big soldering gun too small. My big American Beauty electric tinning iron used to solder gutters works, but so slowly I gave it up in favor of my propane torch. Unlike a monster soldering iron, I can always find a use for a good torch. A very low flame and keeping the torch moving makes lots of work, but produces excellent results!
- Tools & Supplies:
- Tools
Propane or MAPP gas torch, soldering tip not required
Jigsaw, router, or band saw preferably with a circle cutting jig for cutting out round MDF disk templates.
Electric drill
3/32" & 5/32" Drill bits
Tape measure
T-square
50" straight edge
Compass or trammel points
Hammer and metal backer block
Rubber mallet or dead blow hammer
Tin snips
Screwdriver
Protractor that opens to 9" for drawing up to 18" diameter circles
6 each 6" worm drive type 1/2" metal hose clamps (to help form and hold cone & large cylinder during soldering)
4 each 3" worm drive type 1/2" metal hose clamps (to help form and hold outlet cylinder during soldering)
2 each 1"+ nylon ratcheting band clamps
Pliers
VISE- Grips or clamps
Scissors
Medium metal file
Wire brush
Good heavy leather work gloves
- Supplies
If you are a touch on the perfectionist side like me 1 pound of solid core heavy wire solder is enough. If you are a little more careless and create more open joints then get 2 pounds of solder. The non lead type is safest, but will not work on some of today's galvanized steel. With galvanized metal, you should try a little solder first. There are a number of different galvanization processes and some do not solder with normal solders and fluxes. You can buy special solder at welding supply stores designed that work with almost all galvanized metal. Using solder that is at least 50% lead will work on almost all galvanized metal.
An appropriate solder flux like the All-State Welding Alloys, Co. Duzall flux (Just about any flux will work if you are soldering bare cold rolled sheet metal, but if you are trying to solder galvanized material you need a special flux).
4' x 10' piece of 24 gauge galvanized steel or cyclone kit (note many want and use thicker metal, but unless you have access to a slip roll, 22 gauge and thicker requires lots of patience and time to roll without kinks and bends by hand!)
Flux brush or old toothbrush
At least 4 long reach Vise Grip type welding clamps with homemade aluminum pads or 30 Each #8 pan head sheet metal screws, 1/2" if you are going to use screws for fastening or soldering
10 Each 3/4" long self-starting sheet metal screws to secure the wooden top to the cyclone body
6 1/4-20 T-nuts that will go on the bottom side of the wooden cyclone top to hold the blower.
1 Pint lacquer thinner
Grey or red "Scotch Brite" pads
Rags
5' long piece of 6" diameter PVC or similar sized tube to help with forming
5' long piece of 4" diameter PVC or similar sized tube to help with forming
3/4" Thick 4' x8' sheet of MDF or plywood to make the cyclone top pieces and the template rings that will hold all nice and round when you do your assembly.
Fine felt tip marker (Sharpie, etc.)
Wooden scrap block
12" x 18" thin rubber or vinyl sheet to be used as a blast sheet
Glue for that sheet (Barge cement, contact cement, etc.)
2 each 24" pieces of at least 1" angle iron.
Piece of 300 grit emery cloth.
- Tools
- Preparation Instructions
- General Instructions
Always wear your heavy work gloves when handling sheet metal including when you buy it. Sheet metal and the staples frequently used in the metal packing boxes are razor sharp!
Shipping and handling heavy sheet metal without a few dings and bent corners is impossible. Those dings and even some pretty significant tears in the package are nothing to worry about unless the metal is torn or seriously stretched. You can easily fix any bends, dents, or dings using a hammer and backer block with light taps on your metal. You can fix flat pieces on smooth concrete and it is best to have a curved metal block like automotive body workers use for the curved pieces (you may have to work both sides).
For those building their cyclones from a kit, verify your package contains the poster board templates (6", 9", & 18" discs) and the sheet metal for your:
Cylinder
Cone
Inlet
Inlet 6" transition
Outlet
Air ramp
Dust Chute
Practice sheet metal for soldering (kit practice pieces are each marked with a large X)
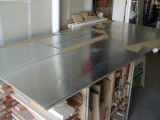
Reduce the chances of getting cuts or metal slivers by carefully going over all the edges both sides with your metal file.
Take the sheet metal outside and thoroughly clean both sides with rags dampened with lacquer thinner. It generally takes two or three passes to get it really clean enough. If you leave the oil on the parts you can not make your solder stick, the caulking will not stick, the glue will not hold for the interior rubber blast plate, and paint will not stick to your cyclone.
-
If you bought a precut cyclone kit then skip the following cutout instructions.
- Instructions
Important: Don't cut the tabs until after forming! Cutting tabs before marking or forming not only creates lots of dangerous sharp edges, it makes the metal buckle and bend at the cut lines making it near impossible to make nice even curves, so is bad technique!
-
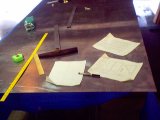
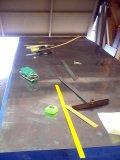
I used a couple of sawhorses with a 4' x 8' sheet of heavy plywood on top covered by a heavy tarp to make my cutout work area.
-
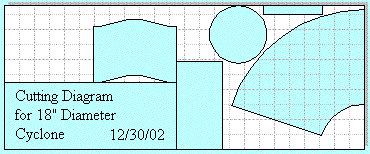
Layout your metal parts following the spreadsheet dimensions using the small cutting diagram that is on the right corner of the spreadsheet and shown below. If you mess up at all here or are sloppy in your cutting, the cyclone will not go together well at all. You must be dead on with this marking and cutting!!
I used a Sharpie black marker to layout only the cut lines. Follow with a sharp metal scribe to scratch in both my cut and fold lines. The clear silver scratch shows up well on the back marker lines making it easy to see exactly where to cut.
-
My cutting started with the little rectangular dust chute to get a feel for working with my tin snips. I tried both aviation snips, and an ancient pair of snips that I inherited from my father. The aviation snips use a compound action that was lots easier on my hands, but the older pair did not leave the burred edges from my aviation snips.
-
My next cut was the cyclone upper cylinder.
-
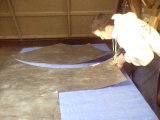
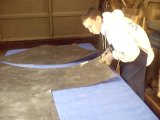
That cylinder got stood up on top of the cone that was still flat to ensure an exact fit. I did the same with the dust chute ring verifying it was the same size as the bottom of the cone. I used welding and other magnets to hold both into that same curve. That curve is the one just below the top of the cone, not the top of the cone!! That excess will be bent out to form the tabs for soldering to the top.
-
Once I verified that I got all marked correctly I got my number one son busy cutting away. You can cut with tin snips, a metal jig saw blade, a power cutter, or any of a number of other devices. Using tin snips works well for us but is hard work. Did you know that puckering up helps with the serious concentration? It does!
-
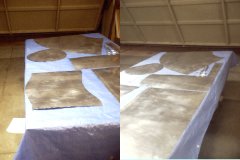
After a little sweating and lots of diligent work, "we" had all the pieces cut out. Both of us had hands so sore we needed to go rent some videos and rest up for a couple of days!
-
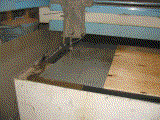
Now that we are experts, I wonder if my wife would let me have a new computer controlled laser cutter. We could fill in the pool and put a roof over that area! *Wondering why my son is looking at me so funny??*
-
- Soldering 101
This is another one of those. I took it for granted that most knew all about soldering. Based on some of the pictures I got back, I screwed up badly. There are lots of ways to solder and most can be made to work, but here are a few pointers for your practice pieces than can make a world of difference and use about 1/3 as much solder. I strongly suggest that you work with some scrap pieces to get your technique down.
- Technique Overview
In a perfect world we could just put the two pieces of metal together, apply heat and solder, and "poof" there would be a good joint. The theory is not that hard. To get a really pristine solder joint you need do the right preparation, and use the right soldering technique. In terms of preparation you have to thoroughly clean the metal surfaces, sometimes including having to remove the galvanized coating. You have to hold the pieces tightly together. You need to slowly heat both the metal and your fasteners all to the same critical temperature letting the metal melt the solder, not your heat source. Then finally you need to let it all cool totally undisturbed.
This is not a perfect world and in practice during soldering just about everything can and will go wrong. When melted, solder becomes very thin and runs like water or even alcohol. It will only go into and stay in a nice clean tight joint that is at the correct temperature. If you don't start with new un-oxidized solder and clean tight joints, your soldering will be a mess. To have a nice tight joint, you can't do like a welder and just use a clamp because a clamp will steal all the heat from the area that the clamp pads touch. That leaves an area completely unsoldered. You can't just let the two pieces of metal stand on their own because sheet metal expands at different rates opening gaps between the two pieces. The very liquid solder just pours through any extra opening. Using clamps to hold the metal together does not work because the clamps make controlling temperature near impossible. Tight joints require carefully forming the metal and then securing it every 1" or closer to hold all together for soldering.
Many find getting to that correct temperature very difficult without getting all too hot. The right temperature depends upon solder type, flux type, and metal, so no one temperature will work for all soldering. With an open torch flame, bringing a small area of metal up to the ideal temperature without overheating takes practice. The secret is to heat slowly and let your solder tell you when you are at the right temperature as it will flow onto metal that is just right and you do not have to melt the solder with your torch. The solder needs to be hot enough to flow. Heating slowly keeps you from heating past that point where the solder and metal oxidize. Solder will not bond to oxidized metal or solder. Overheated metal also warps making a bad joint or even ruined piece. Once the solder or metal is overheated, you must start over with another round of cleaning and scuffing.
In practice, even those who do lots of soldering, find this whole process very frustrating, wasteful of lots of solder, and creates ugly looking joints, so they use a different process. We make our joints in a couple of steps. We first tin each part of the joint to be soldered separately, use fasteners to hold all together during soldering, then bring the two parts together and gently heat a much larger area adding just a little more solder to make a nice tight strong joint. Here's a brief overview of this technique:
- Surface Preparation
-
The surfaces to be joined must be totally free of oil, grease, or other contaminants. Take your parts outside and clean the areas to be soldered with lacquer thinner to remove any oils or other contaminates.
-
Even after a thorough cleaning, you may still have some rolling oil or other contaminates on your metal that could interfere with soldering. You need to start by testing your metal to make sure it is clean enough and your solder is compatible with the galvanizing. You make this test by just using a little flux on some already cleaned test metal, gently heating moving your torch back and forth around about a 3" area with a little solder touching the heated area. Let the metal melt the solder. Do not melt the solder with your torch or you get poor joints!
When the metal is hot enough to melt the solder one of two things will happen. If you get a nice smooth coat of solder with the solder spreading out easily, then you have compatibility. Unfortunately, for most what happens is the solder will bead, flow under the galvanizing, or oxidize badly and just plain does not work. If your solder misbehaves, then you are going to have to make repair. Make sure you have new shiny solder that is not oxidized or are using the special galvanized solder. If new solder still causes a problem, then change over to a flux designed to work with galvanized metal such as the All State Duzall flux. If that still does not work, use a wire brush on a drill to scratch the areas to be joined down to bare metal or forget the soldering and consider using rivets. A few will use an acid wash, but that is still no guarantee for success like sanding off the galvanizing. The problem here is that many different materials are used for galvanizing. Most use pure zinc, but some use zinc mixed with a range of other metals that makes the coating much tougher, but in some cases impossible to solder. -
If you did not have to remove the galvanizing, lightly scuff the joint area with either sandpaper or a Scotch Brite pad. If you have to, then use your drill and wire brush (still outside with a mask on as the dust is major unhealthy) to clean the galvanizing off the areas to be joined down to bare metal. If you do this, I recommend that you buy a spray can of cold galvanizing compound or paint your unit inside and out to prevent rust. That bare metal will rust quickly.
-
Clean the just prepared areas again with lacquer thinner and bring back inside.
-
Get yourself a roughly 8" square rag and make it damp with water, but not too wet.
-
Get together your clamps, jig, screws, pop-rivets, or Cleco fasteners to hold all together for soldering.
-
- Tinning
-
First we learn how to tin. Use a small flux or glue brush to put a thin coat of flux on both pieces of metal just where you want solder.
-
Lie the piece flat or with just a few degrees of tilt to let the solder flow into the joint and down the joint.
-
Light your torch and adjust to a very low flame. If using a propane torch, adjust the gas so the brighter blue flame project about 1/4" to 3/8" out of the torch with the tail a few inches long. Many adjust by sound backing off the valve until you no longer here a whistle like sound. Never tilt the torch so a stream of liquid gas runs into the flame as that will be so hot it will buckle and quickly oxidize the metal ruining its ability to take solder! Regardless, make sure your torch keeps a very low flame and gently heat the metal moving back and forth over about a 3" span while holding the solder at the center of the area you are heating. If you overheat the metal, you may have to prepare all over again, so take your time and move slowly. Let the sheet metal melt the solder, not the torch flame. When the temperature is right, the metal will melt the solder and the solder will spread out over the heated area that is covered in flux.
-
For tinning, you only need the finest coat possible to just cover the area to later be soldered. With the solder still liquid with practice you can create a drip that you control with heat and tilting your work to move right down the area to be tinned. For those who do not want to work this hard, you can keep the work flat, solder an area then quickly wipe away the excess solder using a single stroke with a damp rag toward the area still unsoldered. This leaves a pristine looking smooth shiny coat of solder. If you got it too hot, sometimes you can scrub a heated area with flux to clean it, but you will go through a lot of brushes this way. Otherwise, to recover from getting the solder or metal oxidized from being too hot you must clean and prepare it again, then reapply the flux and re-tin. Always let the joint cool for at least 5 minutes before going on to the next soldering step!
Important: Making the area to be soldered near flat and horizontal is necessary because trying to solder uphill or at a steep angle is tough and dangerous. When liquid, solder runs like water and can burn you badly.
-
- Soldering
-
Once you have a good tinning coat on both pieces, put them together and lock them in place with your fasteners. I personally like screws if you don't have a set of Cleco fasteners.
Screws are much easier use and remove than pop-rivets. To put in the screws I drill out a 3/16" hole in what will be the outside of the metal every 1" all the way down the joint. I then take whatever time it takes to ensure the metal is so well formed that it will sit in near perfect final position without having to use any clamps or otherwise.
I then flux both pieces with an even coat of the flux before assembly. (In truth I've so many times gotten it all screwed together and then realized that I forgot the flux that I should be putting a note on the work!) Using my template disks for the round parts, I generally put a screw opposite the side with the joint to hold all in place, then use metal screw type hose clamps to hold all just right. I used to use nylon band clamps but found they do not hold as well or as tightly as the metal screw clamps and with the metal band clamps I don't have to screw the metal to the rings. If you are careful in making your rings and disks, your cyclone will have near perfect sizing, will go together easily, and makes the result come out round instead of all weird.
I then using a wooden backer block drill a 3/32" hole through the inner piece of metal going right through the outer screw holes. This lets the shaft of the screw turn in the outer piece while drawing up the inner piece nice and tight without stripping (use a hand screw driver or you will strip most!). I double check and if there is more than a sheet of paper thickness of gap, out comes my small hammer and backing block or additional screws as needed. An open joint just will not solder cleanly.
At this point I do a little magic thanks to my retired artist professor friend Don Heberholtz. I think my mother (also a retired art professor) taught me that to just get something done go get an engineer, but to learn how to really do it right go find a good artist. Don taught me that using just the smallest amount of that All-State flux on the joint will make all the difference in the world. Just 1/2 oz. has been enough for me to do three cyclones and still have a half bottle left. I think from the smell that this is an acid, but don't know which one. Regardless, this works so well that if I have really clean metal, the need to tin in advance vanishes!
I position the joint almost flat with just a little tilt to let the solder run both into and down the joint. I then put on just the least amount of the All-State flux touching its roughly 1/64" tip opening to the edge of the joint letting just a little flow in. followed by gently heat going back and forth about 3" of metal. -
Take your torch again with low heat and warm that exposed portion until you see the tinned solder just get shiny, then flow a tiny amount of solder right into the joint. I let the hot metal not the flame of my torch melt the solder. When the temperature is just right, two things happen. First the galvanizing bubbles with the solder flowing underneath and the solder will also flow into the joint.
If the joint is too open it will flow right through. If it is just right the joint will "wick" in the solder to create a very smooth curved edge of solder with no bumps or problems. That little curve of solder if bonded correctly will make a curved surface going up from the lower piece of metal to the edge of the upper.
I continue to add solder to the already melted area as I use my torch to heat down the joint. If you tinned correctly, On larger joints sometimes you also have to solder from the inside the same way to get a good joint all the way through, but this should not be a problem if you used screws and nice tight joints with careful heating. -
Any time I have a flow through, I know I messed up and the metal is not pressed tightly enough together. Likewise, when I do get a blob or problem, I take a damp rag and after heating that area with my torch, simply wipe off that area toward where I will next be soldering, then let it cool. After it cools, I put on new acid flux. The damp rag can take away any mistakes and leave professional looking joints that paint beautifully!
-
Getting the screws out is easy if you did not solder the screw heads. Still, some of us can get a little heavy handed and bury or coat a screw deeply with solder. In that case getting the screw out is near impossible unless you know the right trick because solder sticks to the screws. The easy way is to use metal clamps on either side of the screw to provide heat sinks so the whole joint does not pop open. Then just barely heat the screw and end of your old screwdriver. This will take the temper out of driver. The screw will break loose before the joint if you do this right, otherwise that screw might just have to be ground away with a bit becoming a permanent part of your cyclone.
-
I again use my All-State flux just enough to wet each hole, then fill the holes with solder making sure you have a backer board below the hole or the solder will run right through. Either use a metal clamp on each side of the screw hole or work on holes well apart to allow enough time for each to cool so you don't pop open your joint! Don't allow the joints to reopen.
-
Use your rag that is only lightly damp with solvent to wipe off the excess flux. If you somehow ended up with rosin cored solder, you will have a muddy brown and black mess. Fortunately, you can take the piece outside and use lots of lacquer thinner to clean that mess off.
< br/> After studying the above technique, try it on enough scrap pieces until you get a feel for how much flux to use, how long it takes to heat up an area, and how to flow just enough solder into the joint.
-
- Cutout Preparation
-
Take your hammer and find a piece of smooth concrete or backer steel and carefully go around each edge both sides to flatten any bends, cut marks, or dings. Don't pound on wood as that will leave dings!
-
Using your straight edge, t-square, marker, and compass, carefully draw on the metal all of the joint, folding, and cut lines. Joint lines are marked on the diagram with dotted lines. Folding lines are marked with dashed lines. And, cut lines are marked with solid lines. Be careful as these lines will show you what you need to do.
-
- Wooden Templates
-
Make your wooden parts and templates accurately and clamp tightly if you want the pieces to fit together when done. Also, the larger donuts will become part of your cyclone:
-
Use scissors to cut out your kit wooden circle patterns right on the inside line and trace the patterns onto your MDF or plywood. If you don't have a kit, then carefully draw the patterns right on the wood using a protractor.
 <= Router Circle Jig
Carefully cutout all the wooden parts. Use of a circle-cutting jig is preferred, but if you don't have one, then cut just outside the line and use a belt or disk sander to make all right on. You need to make yourself the following rings:
-
2 each 18" donuts for your upper cylinder and cone top to hold them round during soldering. Be careful with the ring that will be used to make the top of the cyclone to hold the cyclone to the blower. I use that ring away from any area to be soldered and make the other ring with a hole on the side that I can work through to tack all in place. You need to put a bevel or 1/4" round over on these rings that will be put in and out of the cyclone, or you will never get them back into the unit after things are soldered up. You will reach through the ring holes during the construction so round each over a little with sandpaper to save your arms! These rings should be drilled when clamped together with the bottom of the blower. Make six equally spaced holes on a 12" diameter circle, and press 1/4-20 T-Nuts into the lower ring. These holes and T-Nuts will later permit bolting the cyclone upper rings to the blower bottom.
-
2 each 9" disks for your outlet cylinder to help in forming and hold it round during soldering.
-
2 each just a metal thickness less than 6" disks to help with forming and soldering the bottom of the cone and the dust chute. This sizing is important if you want your cyclone dust outlet and cyclone inlet to fit regular ducting. Save one of these rings as a plug for later leak testing of your cyclone.
-
-

- Technique Overview
- General Instructions
- Metal Forming
Important: Key to good preparation is working slowly and gently using your fingers to form the metal without forcing it. It takes a while, but with patience you can get it to almost fit perfectly just as it will sit when soldered.

- Form the cone
-
Mark the center hole and drill 5/32" holes along the same edge that your will overlap on the upper cylinder.
-
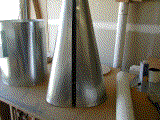
Form the cone. It seems to work best to work the whole cone into a relatively tight cylinder around the 4" pipe using a clamp then open it carefully to the right shape. You may need to use the PVC more to work the bottom into the right shape as narrow pieces of metal are harder to form.
-
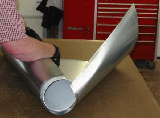
Work at forming the cone and getting it just right so it will stand on its own (See picture above).
-
After forming, we need to put the flared top on the cone that we will use to attach the upper cylinder. The best way to do this is with a sheet metal rolling/beading machine such as a Pexto. These machines will with a number of passes let us simply bend over a 3/8" wide tab as they stretch the metal as it gets bent creating a perfect platform to hold the upper cylinder. When I make my cyclones I flare the cone, cut 3/8" deep tabs on the upper cylinder, then flare the upper cylinder followed by bending the tabs down to nicely socket the cone. We can do the same thing by hand but this requires cutting tabs on the cone and deeper tabs on the bottom of the upper cylinder. If you don't have access to a machine to make the flare, cut 1/2" wide tabs each 3/8" long on the large curved end of the cone to mate with the upper cyclone cylinder.
-
Cut ¼" wide tabs each 3/4" long on the small curved end to mate with the dust chute outlet.
-
Place the solid 18" disk template on your work surface.
-
Clean, scuff, and put on the flux.
-
Make sure the joint is aligned so the airflow falls over the joint overlap instead of ramming into it.
-
Mark the hole closest to the middle.
-
Put the cone wide upper end down on the template and secure it with a screw clamp snuggly. I used a regular stainless steel 1/2" worm drive screw type screw clamp to hold the disk tighter. I made my 18" worm drive clamp by taking apart three 6" clamps and screwing them together. These 6" clamps can later be used on 6" flex hose. Note in the picture that I made little metal tabs that hook onto the clamp metal to keep the template from slipping out when the clamp is tightened.
-
Do the same on the bottom with a just under 6" disk template clamping snuggly. I made a wooden cross bar that holds my wooden 6" template in place so when clamping the clamps do not pull the template into the cone.
-
Ensure both templates and cone ends are flush.
-
Start in the center then drill with the 3/32" bit and a backer block. Screw this joint together again working from the middle outward to keep the joint smooth and tight.
-
Solder the joint. Remove the screws and sand off any burrs.
-
Sand or scrape flush.
-
Remove the 18" disk template.
-
Bend the tabs on the top and bottom of the cone as needed.
-
- Form the Outer Cylinder
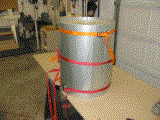
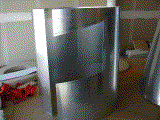
-
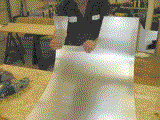
Start with the cylinder on a large flat work surface (I use a couple of sawhorses with a sheet of plywood on top covered by a thick canvas drop cloth to keep the parts from getting scratched)
-
If the spinning air inside the cyclone hits the blower impeller going the wrong way, then the motor must do lots of extra work to reverse that spin and we lose considerable airflow. We need to make sure our cyclone, motor and impeller spins match! I prefer to build either a left or right hand cyclone to best match the shop in which it gets installed. We can easily figure out which way the air spins in our cyclone. The airflow coming into the cyclone will spin in the same direction that the inlet starts it. The air in my cyclone design spirals down then goes up without changing direction of spin. So a left hand cyclone will have its inlet coming out the back left of the cyclone which means we get a clockwise airflow. Most build left hand cyclones because that airflow matches most available impellers and reversed impellers are expensive and hard to find. If the inlet is located on the back right of the cyclone then the airflow inside is counterclockwise and we have a right hand cyclone. Both right and left separate equally well, but only if you match the motor, impeller and cyclone airflows.
-
I found matching impellers and motors frustrating. Looking at either the impeller or motor shaft from the wrong side reverses direction and our vendors inconsistently cite rotation direction for both motors and impellers. Most, but not all impeller makers define their impeller as clockwise or counterclockwise rotating when looking at the blade side. Regardless of what a vendor says, we can easily figure out which way an impeller turns. To minimize noise our dust collection impellers turn with the curved edge leading. Determining motor direction almost always requires either a picture or turning on the motor. Most motor makers, but not all define shaft rotation when looking at the motor shaft from the back of the motor. I prefer reversible motors which let me match the motor and impeller spin.
-
The air spinning inside the cyclone should turn in the same direction as your impeller spins or your motor will have to use extra power to reverse the air direction. To match directions between the impeller and cyclone you either buy an impeller that matches your cyclone or build your cyclone to match your impeller. You can form a left handed (LH) or right handed cyclone by flipping your cut cylinder metal over before forming. If you roll the cyclone upper cylinder so that the inlet is on the back and coming out the left then you get a left hand cyclone with clockwise airflow. LH cyclones give optimum airflow with the Clear Vue impellers. If you instead flip the cyclone upper cylinder and roll it the other way the inlet ends up on the back right creating a right hand cyclone and counter clockwise airflow.
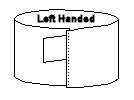
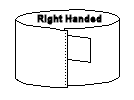
-
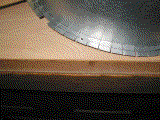
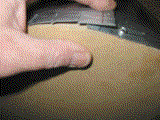
If you look closely the above pictures show what happens if you cut the tabs before forming! If you look closely at the picture with the hand you will see the already cut tabs. The next picture with the bands shows how badly the cyclone outer cylinder bent because of those tabs. The bending process starts with those cuts and immediately creates an ugly wrinkle.
-
On the end of the cylinder opposite the intake cutout mark a line 3/16" from the edge that will be your guide for drilling the screw holes needed to hold all together while you solder.
-
Also mark on the inside of this piece the diagonal line that your air ramp will follow. This will make the air ramp a lot easier to install later.
-
You first need to hold it together while soldering. If you use screws, start 3/8" down from the top and drill a 5/32" hole on that guideline then another hole every 1" down making the last one 3/8" from the bottom.
-
Start forming the cylinder by gently forming a roll. Slowly work the cylinder rolling it on a curved surface (I used a piece of 6" PVC pipe) until it tightens up enough that it will hold its shape without having to be clamped. I found rolling it into a tube like you would a piece of paper works well, then just kept working that roll in the same direction on the table tightens it up nicely. Pushing too hard will form a buckle, so be patient. A piece of 6" PVC can also help if you have a difficult spot or need to use your hands to work out a buckle. I clamp the PVC between two sawhorses.
-
Put one of the 18" donuts on the work surface then stand the formed cylinder on that template.
-
One last quick wipe of the soldering surfaces with lacquer thinner then put on your flux on both surfaces to be joined.
-
Use a screw clamp to pull the bottom of the cylinder tightly onto your template ring.
-
Flip it upside down and do the same with the other donut template and a second screw clamp.
-
The center of the joint should pull nicely together with no big gaps or buckles. If not, you need to go back to the forming step.
-
Make sure the templates and cylinder are flush at each end.
-
Put your wooden scrap block as a backer inside the cylinder and drill a 3/32" hole through the 5/32" hole you marked on the cylinder seam as the center hole and put a screw through that hole.
-
Then work from the center out on each side evenly continuing to drill and put in the screws. If you do not work from the center out, you will get buckles and a poor solder joint.
-
With all the screws in support it so you have a flat joint and carefully solder making sure you don't solder over the tops of your screws. Use your damp rag to make the joint look professional as you go. Let all cool for at least 5 minutes.
-
Loosen the screw clamps on each end and tap the rings down about 1" then retighten the clamps. Drill and put in the final screws where the clamps were then finish soldering this last little bit of seam on the top and bottom.
-
Remove the screws, dab on solder to fill the holes moving from one end to the other to keep from building up so much heat it pops open the joint. Finally, sand or scrape the soldered joint flush.
-
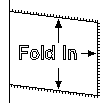
Cut tabs to the 3/8" line around the intake hole and bend the tabs as shown in the diagram.
Now we need to prepare the bottom of the outer cylinder to socket over the top of the cone. The best way to do this is with a roller/beading machine like the Pexto. With one of these machines you need to install the lower wooden forming ring to ensure all stays round. Then cut 1/2" wide tabs 3/8" deep all around the bottom. Then use the machine to flare the bottom 3/4" out. Then use the machine to bend the tabs down parallel with the cylinder walls to create a socket to slip over the cone. Without a machine you need deeper tabs and will hand bend each. Keep the lower ring in place, cut tabs to the 3/4" line around the bottom of the cylinder and bend the tabs straight out at 90 degrees. Leave the wooden ring clamped in place as we will need it to hold the cylinder and cone round while we bend the cylinder tabs over the top of the cone to attach the cone to the upper cylinder.
-
- Form the intake
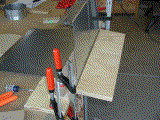
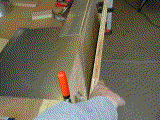
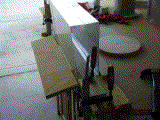
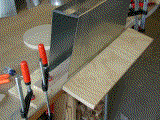
Center a middle intake bend line over the sharp edge of your MDF or plywood and clamp the angle iron on tight making a flush joint with the MDF that has the metal sticking out.
Start with your gloved fingers and lightly work all over the metal to begin the bend.
When you have it as far as you can go by using your fingers, then lightly tap with your rubber mallet or dead blow hammer to make a nice sharp joint.
Repeat for each of the other side folds on the inlet adjusting as you go to end up with the right dimensions. If you are a little long you can make the opposite bend a little shorter - this makes a little bit of a parallelogram but we will not tell and is needed to make the transition and air ramp fit.
Clean then flux the mating surfaces.
Use the Vise grips and your tape measure to clamp the unit to the right size.
Again working from the middle out drill and screw this together with a good tight joint.
Clean, flux, and solder the center joint to make your inlet.
Now attach the inlet box to the cylinder. Bend the tabs all inward as shown in the diagram. Use a worm drive band clamp to firmly hold your top and bottom rings in the upper cylinder or you will end up with a cyclone that will be warped and unusable as it will neither fit the air ramp nor the top ring. Slip the inlet into the cyclone putting its leading edge right to the cylinder seam with the overlap. Hold it in place with by drilling a hole in the upper corner through the cylinder and into the corner of the inlet box and install a screw or pop-rivet with the head on the inside. Then adjust the angle of the box so the box edge and the cylinder seam are parallel. Drill and install a second screw or pop-rivet in the lower corner, again with the head on the inside. With the box held firmly in place, put either some metal or heavy wood inside, then gently use a hammer to bend over the tabs on the top, bottom and side to carefully close up any gaps. Then either clamp or drill the tabs to hold them tightly in place during soldering.
Clean and apply flux to the areas and tabs to be soldered.
Get your inlet placed just right into the cylinder then lock it in place with screws again working from the center out.
Solder the intake to the cylinder and the cylinder seam.
Remove the screws and fill the holes with solder.
- Form the cyclone Outlet cylinder
Mark and drill 5/32" holes on one side of the outlet seam as you did before.
Form the outlet as you formed the cone and cylinder. This one also seems to work best by squeezing the whole cylinder smoothly around the 4" pipe using the screw clamps then open it gently to the right size and shape.
Scruff and clean the joint areas to be soldered then put flux on both surfaces.
As you did with the big cylinder clamp a 9" template ring flush on each end.
Working from the center out, drill 3/32" holes and screw the joint together.
Solder the joint, remove the screws and fill the screw holes.
- Join the cyclone upper cylinder to the cone
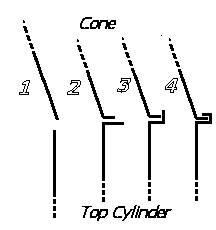
The 3/4" tabs on the bottom of the cylinder should be bent out as shown in step 2 of the above diagram. Likewise the 3/8" tabs on the cone should be bent out as shown in the same step. The wooden lower ring should still be clamped tightly in the cylinder and raised up from the bottom.
Flip the upper cylinder upside down with the tabs on top.
Put flux on the upper cylinder tabs and on both sides of the cone tabs.
Now bend these tabs with another 90 degree bend as shown in step 3.
Rest the cone inside the upper cylinder tabs. Align the tabs so the cuts are not over each other.
Bend the upper cylinder tabs over the cone all the way around. Then use a pair of vice grips to squeeze the joint tight.
Solder the joint from the top, then flip over and solder the other side.
Remove the sizing ring. If you do not remove the sizing ring now, getting it out with the air ramp installed can be a challenge requiring ruining the ring by cutting it up with a jig saw into pieces small enough to be removed.
- Form and attach the air ramp
Making up the cyclone outlet, soldering the air ramp to it, and then working to make it fit to the outer cylinder causes problems if you don't understand three things.
First, even with a good brake and wooden templates, getting an outlet to match right on is near impossible. Worse, any error gets squared then multiplied by Pi, so even a tiny difference becomes a big gap. Rather than try to require all pieces to be made perfectly, I've allowed for some extra clearances and use sizing rings to ensure consistency.
Second, if you don't use your sizing rings on that outer cylinder any errors are going be multiplied by Pi leaving almost no chance of being able to later install that inner cylinder that serves as the cyclone outlet or be able to attach the cone because your cylinder will be far out of round. Failure to use the rings also seriously hurts cyclone performance due to poor internal air flow.
Third, the air ramp is not a perfect fit and was never designed to be a perfect fit. I traded emails with the professor at Cornell who shared the math used to calculate the air ramp sizing. To be a perfect fit requires not a flat donut shape but instead a curved conic shape which requires metal expansion. To make our flat metal ring work without the required special metal forming tools what I did was make it so the air ramp fits tightly to the top of the air inlet and tightly to the inside of the cyclone outer cylinder. The air ramp is not supposed to fit tight to the cyclone center outlet tube or flush with the bottom of the inlet. The air ramp is designed to create a wedge shaped hole between the bottom of the inlet, the air ramp and the side of the cyclone. This hole is required if we want the air ramp to fit nicely without warping. This hole also allows a way for the inevitable dust that gets inside the dead area enclosed by the air ramp to escape.
I used to recommend using a rubber gasket to help seal close to the cyclone center outlet cylinder, but that joint does not need to be sealed, smooth or air tight. Make sure you do not use sealant on the center joint or you may never be able to take your cyclone apart. We need to be able to take the outlet cylinder out to clear a plug or board stuck in there sideways.Check your dimensions against your intake to make sure you have a snug good fit.
Scruff and clean the joint areas to be soldered.
Make sure your outer cylinder is still marked all the way around with an easy to read dark line showing where the air ramp will touch that outer cylinder.
I think the best way to install the air ramp is to pull it tight to the top edge of the inlet and tight against the adjacent cyclone outer cylinder wall then either solder, screw or rivet it in place to the top of the inlet. Stretch it out so it makes one full turn around the cyclone outlet cylinder. With that top secured and sizing rings in place, then expand the air ramp to make a tight fit to the outer cylinder wall by pushing the bottom of the air ramp toward the bottom of the inlet. You want a nice even contact without warping. Then secure the air ramp to the cylinder wall and to just the inner most edge of the inlet. After soldering I use caulk to make a smooth joint and seal that connection between the ramp and outer cylinder wall.
Attach the spiral down the outside of the outer cylinder either using solder, HVAC sealant (recommend Eco-EZ Seal 44-39 High Velocity Sealant), polyurethane caulk, or good 3M automotive urethane windshield sealant. The result produces a nice airtight joint. Don't use silicon caulk because over time it reacts with the metal creating acetic acid and then falls off.
Lower the cyclone outlet cylinder down and use a sharpie marker to show where to trim. I hold my marker side tight to they cylinder to make the line about 1/8" oversized. Between a good pair of tin snips and lots of marks and cuts (some on me), I ended up with a nice hole that is 1/8" oversized. I got from an auto parts store some flexible rubber door edge guard (comes in a roll) material that slips on and then seals tight. It gives enough room to work that cylinder in and out, and a good enough seal as the critical seal is where the air is moving fastest. That's on the perimeter on that outer cylinder.
In terms of how critical that fit is, two of the industrial units we checked out had more than 1/4" gaps between the sides of the air ramp and outer cylinder. It will work any which way, but maximum efficiency requires a nice clean soldered, caulked, or glued seam on that outside. In theory the airflow on the inside is so low and small, it should not be an issue.
Here is an interesting picture looking up into the cyclone from the bottom that shows what the air ramp looks like installed. Thanks Red Dwyer for the picture!
- Form and Attach Dust Chute
Flux the mating surfaces of the joint.
Form the dust chute around the 6" template. I use one 3/4" wooden template and actually make my 6" cones so they taper from 6 1/8" on top to 5 7/8" on the bottom so the flex hose and ducting slides on easier and stays tighter.
Use a worm drive clamp to pull that metal tight and work the metal until you have a nice smooth joint.
Solder both ends of the joint then tap out the wooden disc out the larger top side..
Put heavy metal clams over the soldered ends to keep the joint from popping open and solder the center section.
Spread the tabs on the bottom of the cone just a little outward to make a nice cylinder that will solder onto the inside of the dust chute then apply flux. Alternatively, put on the flux and use a jig to pull that ring tightly onto the cone. I made my jig from a large circle that goes on the top of the cone and a smaller circle that goes on top of the dust chute ring. A long threaded rod connects the two and I tighten a nut to pull the dust chute ring wider end down tightly onto the cone. This makes for a near perfect looking joint with no tabs.
Solder onto the bottom of the cone.
Remove the 6" disks from the bottom of the cone and the dust chute.
Remove the screw and fill the holes with solder.
Although this above procedure works like a champ, I found a little different approach that worked well for me. Instead of cutting tabs on either the cone or the dust chute, I put my cone on a heavy piece of metal (anvil) and lightly pounded just around the bottom 3/8" (some tell me it is lots easier to do before soldering up the cone, but I did it after). This expanded the metal just a little, enough so I got a good tight joint with the already soldered dust chute cylinder. I flipped the cone upside down. Tin both pieces before making the cone or cylinder. Then put on an extra coat of flux as a lubricant. Lightly tap the dust chute onto the cylinder to make a good tight fit. Some deep throated C clamps hold all together while I solder all in place. The results look almost like a single piece of metal!
- Inlet Transition Development
 People who make my cyclone tend to have a problem in getting from their 6" ducting to the 4.5" x 9" cyclone inlet. We do that with a transition. There are three ways to make an inlet transition for this cyclone. Best is to build a custom transition, the longer the better. Next best is to modify an HVAC 4 x 10 to 6" heating register to a 4.5 x 9 to 6" transition. And least best is to tweak the optimum design to use a 4" by 10" inlet that just happens to be a perfect fit with a standard HVAC heating register.
There is a fairly simple but lengthy way to build that transition. Sheet metal workers call this an evolution. Because my plans are scalable that evolution will change based on cyclone size. I've done one by hand for a 13.5" and another for an 18" cyclone. You can follow the below steps to build your own transition. If you would like to learn more on making a transition and have a spreadsheet to calculate all of the specific distances, please see Joe Emenaker's Transition Page.
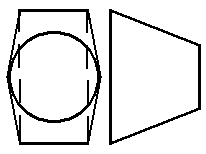 The general concept is fairly simple. By drawing a full sized view of that fitting looking at the circular inlet you can see a circle and the rectangle that it joins.
The more fold lines, the smoother your circle. Most metal workers find it is easiest to divide a circle into 24 parts making for 24 fold lines then smooth the little 1/24th circle segments to make a smoother edge on the rounded part of the transition. Use your compass to subdivide the full sized top view drawing into 24ths. I started by using the circle radius to divide the circle into sixths then used compass and straight edge to divide each six into half twice ending up with a circle divided into 24 equal pieces. If you don't know how to do this, you should spend a little time looking this up on the Internet. Number each point on the circle as shown. Each 1/24th will create a straight line that will approximate the rounded end of the transition. I used a second smaller compass that is set to this 1/24th circle length, as it is needed constantly when doing the metal cutting layout.
 Now add to that top view (looking at the transition from the inlet) drawing the red fold lines used to transition from the circle to the rectangle. These fold lines give us the actual length of a base of right triangle whose height will be the length of the fitting.
 The blue diagonal for each of these right triangles is the actual length of the line used to layout the metal cutting/folding diagram. You can either use math to calculate the lengths of these fold lines or you can get them by drawing a right angle. I find it easier to just build these lines with a compass but you can click here for my excel spreadsheet that does this math for you for an 18" cyclone. Each fold line is a right triangle with height the same as the length of the fitting when looked at from the side. The base of each right triangle comes from the red line length from the top view. Draw in the blue lines. We will later use a compass or dividers to move these diagonal fold lines to our layout. It turns out there are only seven lengths of fold line going out from each corner. This means the first and seventh line each end up going to two corners. Once you have the lengths of the seven fold lines that go from each corner, you have all it takes to layout your cutting diagram.
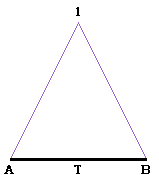 To draw the unfolded metal for cut out start by drawing with a horizontal line AB that is the length of the longest side of the fitting rectangle. Use a compass to set the length of line one. Swing arcs from either end of that horizontal line to set the top of that triangle.
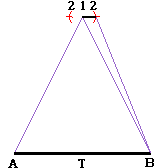 To add the next segment swing an arc that is 1/24th of the circle diameter. Where an arc of length 2 meets that is the end point for the second fold line. Now add another 1/24th circle arc and intersect with diagonal length 3. Each successive line makes another triangle whose base equals the length of a segment that is 24th of a circle.
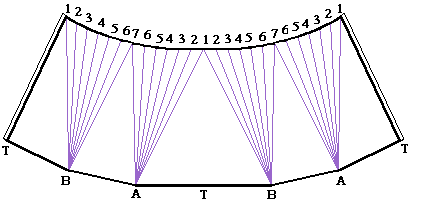 After drawing seven lines, we next need to locate the next corner to create the lines BA. Swing arcs that are segment 7 long from both 7 endpoints. Intersect these with arcs from points A and B that are equal to the size of the side inlet (4.5" for an 18" cyclone). The intersection of these will give the new points B and A for the next two sets of 7 fold lines. After putting in these four sets of fold lines, we then need to draw from that final lower point to the edge of our transition. This is a diagonal of length T or half of what we would get if we made an arc the height of the transition.
Anyhow when it is all said and done, the result plus 3/8" of soldering tabs gives the transition duct. I only showed the soldering tabs for the sides. You also need them for both the circular part and the rectangular part. I used those extra tabs to solder a 2" slightly tapered ring onto the circular part to mate with my PVC.
Here is a thumbnail picture you can click on to get a full sized image of the completed inlet, plus and interesting picture looking through the inlet into the cyclone provided by Red Dwyer. Thanks Red!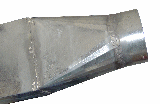
- Form the cone
- Final Assembly & Hanging
After having helped a few friends lift and mount their cyclones, I decided that was crazy. Picking up and trying to hold a heavy motor, blower, and cyclone up in the air while attaching it to the wall or ceiling was way too much work. I remade my design to let us start by separately mounting a heavy motor plate to either the wall or ceiling using heavy metal brackets or your own wooden frame. My personal system uses heavy wall mounted large triangle supported metal brackets purchased from one of the box stores with rubber shock mounts to isolate blower noise from the wall. After mounting the motor plate then we add the motor and impeller. We then mount the cyclone outlet with screws, bolt the blower housing to the motor plate, then the cyclone outlet and rings to the blower housing. Finally, we slip the cyclone onto the rings and hold in place with screws all the way around the cyclone going into the rings. Here are exploded diagrams of the pieces for a traditional mount and for a low ceiling mount:


- Motor Plate
The heavy steel plate that bolts onto the motor is key to holding the blower and cyclone. It gets mounted permanently, preferably with shock mounts so we can later remove the cyclone and blower without having to ever again lift the heavy motor and impeller. There are many ways to mount this plate and a number of different options for adding some vibration dampening. You can attach a heavy metal frame to the wall or ceiling. You can make a wooden cage, etc. I've even seen successful mounts using four pieces of chain attached to the ceiling then to vibration dampers or springs and then to the motor plate. Make sure you use a substantial mount because it will need to carry the weight of everything.
- First Check and Prepare the Motor Plate
I now use a round steel motor plate that is 1/8" thick and 1.0" wider than the diameter of my impeller. It sits in my 3/4" thick plywood or MDF blower top. The blower top has a hole sized 1/8" larger than the impeller to let the blower shroud slip off the impeller without having to take down the motor and impeller. I made a lip to hold that metal plate tightly by routing a rabbet all around that hole. Ideally the depth of that groove I set to be the compressed thickness of my foam plus the thickness of my metal plate. The result would have the top of the motor plate flush with the top of the blower housing. This worked fine for my Delta, Leeson, and Baldor motors, but for a couple of others including my Harbor Freight motor did not work because the shaft lengths were too short. It is safer and easier on the motor to mount the impeller closer to the motor, so I had to recess that metal plate with a deeper groove. If the groove leaves less than 1/4" of material, then a metal ring should be placed on the inside of the blower top to support that plate so it can hold the weight of the motor, blower, and cyclone. Depending upon the length of the motor shaft and your choice of motor, you may have to recess your metal motor plate into your blower top to properly mount your impeller.
- Test the Motor Plate Sizing
The motor plate will be held to the blower top by sitting on a piece of insulation then held tight by bolts holding large (fender) washers that screw into T-Nuts that press into the bottom of the blower top. I used a CNC router made blower top and foolishly made the hole exactly the same size as my CNC cut metal motor mounting plate. To make my unit fit I had to lightly sand the blower top and bevel the edge of the motor plate. Make sure you have a good tight fit but don't yet mount the motor plate to the motor or blower top.
- Mount the Cyclone Supports
My current personal cyclone is supported by a couple of heavy metal frame shelf brackets that indirectly attach to the motor plate. I used the large triangle shaped Stanley heavy metal shelf brackets available from the box stores. I mounted mine upside down to the wall each with three lag bolts to studs 16" on center. Putting them upside down moved the welded in support out of the way to each side of the motor instead of interfering with the blower. Before mounting I drilled four holes in my motor plate equally spaced around the motor with matching holes in my shelf mounts. This lets me use two pieces of 20" long angle iron bolted to the motor plate to rest on the shelf brackets. Instead of resting directly, to minimize vibration transferred to the wall, I instead inserted four soft rubber or neoprene shock mounts that sit between the angle iron and shelf bracket. Although you could spend a small fortune on shock mounts and I did for my first couple of cyclones, it turns out that a trip to a local automotive supply store found four soft neoprene cylinders each with 1/4-20 threaded shaft that sticks out the top and bottom. Mine were made to support a 150 pound transmission. I paid about a dollar each. Remember each only needs to support one fourth of the weight, so their total capacity should be the total weight of your motor, blower, and cyclone. With my soldered cyclone the total weight was about 150 pounds total so finding dampeners each designed to hold between thirty and forty pounds worked out well as each individual shock mount should have a capacity of about one quarter that total weight.
For my earlier cyclones I used a few other mounting approaches to provide some vibration dampening. One of the better approaches other than commercially made shock mounts was using U shaped brackets interlocked with these same kinds of cylindrical shock mounts. Here is a sketch showing how the U right side up and another upside down capture that shock mount cylinder with the screws in the end. Anyhow the U's mount to the ceiling in my shop via a square bar connected to rods or chains. I also showed how to directly mount the motor to a box that you can mount to a wall.
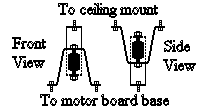
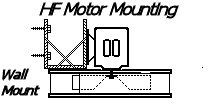
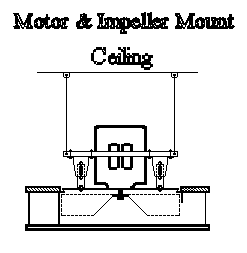
- Mount the Motor and Impeller
With the motor mounting plate fixed firmly in place, put the motor on top and bolted it into place with star washers and the non-hardening Lock-Tite. All bolts that hold the blower and mounts require lock washers and preferably the non-hardening Lock-Tite to ensure nothing slips into the moving blower. Then mount the impeller using either a compression arbor, or special impeller star tipped setscrews with the same non-hardening Lock-Tite to secure the impeller. Make sure the impeller rotates freely and has the required clearances (Detailed instructions are on my airfoil and budget blower pages).
- Mount the Cyclone Outlet Cylinder to the Cyclone Top Rings
I used a square and simply screwed the outlet cylinder to the inside of the lower cyclone top ring. A bead of polyurethane caulk around the lower seam sealed all well in place. I made sure this cylinder easily slips into the cyclone upper cylinder without hanging up on the air ramp. My air ramp has a piece of slotted rubber that runs around the inside to make a little better seal, but only the outer portion of the air ramp needs a really good smooth seal.
- Mount the Cyclone Rings to the Blower
I counter sunk six equally spaced holes on the inside of that bottom blower piece for tapered 1/4"-20 screws. These attach again with the non-hardening Lock-Tite going into T-Nuts to hold those rings and cyclone outlet to the blower. The way I mounted my blower is pretty simple.
- Mount the Blower to the Motor Plate
I used a thin piece of insulation on the routed area on top of the blower. That insulation goes both on the top and a little on the side, to make for a tight seal both on the bottom and edge of the blower plate. I glued a strip onto the top of my wood that when the plate is installed is just a little proud of the surface of the top of the blower. Bolt down through the blower top using fender washers, lock washers, and Lock-Tite to secure the blower top to the motor plate.
- Mount the Cyclone to the Blower
Gently slide the cyclone over the outlet and onto the top rings. I made a board that wedges under the cyclone to hold it in place as I go around and put a screw every two inches. I found no need to seal this joint as it ends up near airtight after using these same rings as templates. I suppose a thin piece of rubber or felt could be used between the wooden disks if you are concerned about leakage, but there should be almost none.
- Motor Plate
- Frequently Asked Questions
-
Ok, so I'm an idiot, but somehow I managed to cut my cone outlet chute on the fold line. I don't want to buy a new piece of metal. What can I do?
There is enough material that you don't need both sets of tabs, but since many cyclones are made with 7" and even 8" sized dust outlet chutes there is an easier fix. Compute the width of an 8" dust chute outlet rectangle, make that part and use it to mark the cone. Now go down 3/4" and make a cut and join as normal. The only difference is you will now have an 8" outlet. And yes, you will have to cut a new dust chute band, but there is plenty of extra material to make that part. Multiply Pi * 8" then add 3/4" for the tabs for the length of that piece. -
What tips can you give me on building my own cyclone? Many are interested in some tips. Now with hundreds having built these units I incorporated the tips they have shared in the above building instructions. Here are a few reminders that are particularly important:
-
Bought my first 24 gauge galvanized sheet metal at a metal surplus shop for $17 for a 4' x 10' piece. The cost was triple at my local hardware stores and the pieces offered were too small to make the cone in a single piece. For my second and third metal cyclones, that shop did not have any more surplus 24-gauge metal, so I ended up buying new sheets at $28 each. I was incredibly unhappy because the coating used on that metal would not solder at all. I tried everything then consulted with a metal expert. He said some coatings, particularly on galvanized metal that will be formed instead of soldered, contain metals and special coatings that provide extra protection but preclude soldering. I had to use swimming pool acid and a stiff wire brush to get down to bare steel to solder these sheets. Best to do homework before making a purchase!
-
For my first cyclone when it was still in the design mode, I cut all the pieces out of poster board at exact size without tabs. That proved dumb as I had to redo including tabs as the tape would not substitute for tabs. I used drafting tape that can be removed from paper without ruining it. Masking tape works, but you need to be much more careful and slow to keep from ruining your poster board when you pull off the tape. I also used heavier cardboard to make pairs of 18", 9" and 6" rings for sizing and to hold the round things circular. The poster board let me tweak until I had a proper fit of the cone to the top cylinder, the inlet, the outlet, the air ramp, and the dust chute. I then used the poster board cutouts to efficiently lay out how I wanted to cut the metal. I then carefully used a Sharpie marker to show where all my cutting needed to be then went over all and scratched onto the metal surface all my lines with tabs and bending areas. The scratch marks provided a dead on line to cut to and the marker made sure I knew where to cut. Lacquer thinner easily removed the Sharpie marks after cutting and assembly.
-
For my last couple of cyclones I made my pattern out of butcher paper including tabs then used those cutouts to make the cutting diagram for the piece of sheet metal. A friend gave me a full sized CAD drawing of my plans that can be used to layout the cutting as well, but I found making copies and handling the overhead of trying to share far more than I was willing to do. My efforts to support a private firm to provide the parts independently did not work out, so I am going forward at this time with my own effort for a complete unit using specialized metal working tools to make a low cost alternative that will take minimum work to assemble.
-
Start by really cleaning the metal well. If you don't this will be a filthy job because the metal is covered with rolling oil. To remove that rolling oil, I found using either lacquer thinner or acetone thinner worked, but do it in a well ventilated area.
-
Choose a good way to cut your metal. Inexpensive aviation snips work well as they use a compound joint that gives more leverage. Get either a left or right set. They pretty much are self-correcting forcing you to cut from one side or the other. They just don't work well at all the wrong way. I got a set of three pair from Harbor Freight for under $10 on sale. You do need to be a little careful as the ones I got have serrated blades that leave marks on your cut. As a result, my son and I use a big pair of snips that my father gave me from his early days in construction in the forties.
-
Don't cut the tab slots on the cone or upper cylinder until after the metal is formed, or they will cause weak points that will make the metal bend in facets instead of nice curves.
-
Before cutting out the cone, cut out and stand the unsoldered cyclone top cylinder bending it to fit onto your cone drawing. Make sure you use the line where you will bend the tabs, not the tab line! I know, learned this one the hard way! This will double-check the arc length of the top of the cone for a perfect fit. Do the same check to verify all other mating parts. The bottom dust chute must mate to the cone, etc. Use rare earth or the bigger arrow shaped welding magnets to help hold the arc just right as you make your checks.
-
Now form the metal. I use a piece of 4" PVC pipe secured between a couple of bench mates. With gloves on I then gently press on either side of the metal gently using that pipe to establish a curve in the cylinders and cone. It takes lots of time and patience, but the result looks almost as though it was professionally rolled. I actually curl the metal a little extra so it does not spring out later and makes things easier to work. For the bent pieces I did pretty well by using a couple of angle irons and clamps with a lot of fussing. My pictures above show a good working wooden brake for bending the inlet. I made it easier on myself by purchasing an 18" brake from Harbor Freight for $19 on sale. You really don't need either if patient, but it does help.
-
Instead of using lapped joints on the upper cylinder and the cone, one of our sheet metal working friends suggested that instead it is much easier to simply put a 3/8" bend on each side that can be clamped together on the outside for soldering. I tried this and it works well, but don't use that approach because I like the "cleaner" look of nice flat joints except for that center one at the top of the cone that needs to be big to add a little strength. I also bought a little sheet metal seam maker, but so far the seam maker is still theory. I see I need a lot of practice before this unit does me any good.
-
Thoroughly clean the whole cyclone with lacquer thinner again prior to getting ready to finish forming before soldering. Lightly scuff the areas to be soldered with emery cloth or a steel wire brush. I'm still trying to figure out a better way and time to put on the flux, but so far it seems best to do so just before soldering. Carefully put on lots of plumbers' flux on just the areas to be soldered, and be careful to not wipe it off as you put the metal together before soldering. An artist friend gave me a tiny bottle of special tinning acid where one drop is enough to prepare a whole joint. After securing the pieces tightly together, just before soldering I use a little of this flux.
-
In general, you need to clamp and hold all together carefully before starting to solder using either clamps, pop rivets, screws or sheet metal holders to ensure a tight fit. If this is your first and you don't have much soldering experience, I prefer using sheet metal screws. Clamps are really tough because they tend to be big heat sinks and make for lots of unsoldered and poorly soldered areas. You will be soldering with acid core solder and plumber's flux. Make sure your solder is a blend of real lead and tin (anything from 50% to 70% lead will work fine), and not the all tin used for drinking water plumbing. The 97% tin 3% copper tends to not stick well and is much harder to use. Both plumbing and welding shops carry the lead based solder. After, you need to remove any pop rivets or screws and fill the holes with solder. Solder flows so freely when melted that if you don't put a backer block of wood or something else, it will run right through those holes! As you go, you can use a pretty moist thick rag on the hot wet solder to take off excess and make perfect looking joints. Afterward, a fine stainless or brass wire brush will quickly take off the excess flux, etc.
-
An important key to a good cyclone is forming round cylinders and round cone. I cheat a little on my forming. I made a 6", two 9", and three 18" wooden disks, all of them right on in terms of size. After putting on the flux, I slip two big wooden disks into the cyclone top and one more into the top of the cone to hold all dead on round and while soldering on the cone. Without those disks, it will become oval or worse.
To pull the metal tight to those disks I made a set of holes about 3" away on each side then used a couple of turnbuckles and safety wire. Just a few cranks on those round shafted turnbuckles will pull the metal top and bottom dead on. One of my friends uses threaded rod and big fender washers on those disks to hold them in place. Alternatively a little drilling with a strategic screw on top, bottom and elsewhere if needed holds all in place nicely. I've had good luck using band and strap clamps to help hold all together as I work.
Next, I bought from Harbor Freight 3 deep-throated welding clamps for $9 a set that work like ViseGrips. The jaws open into a big deep square. By clamping a couple of these jaws fairly close together I can either put in pop rivets or just solder. I at first used the aluminum pop rivets that are easily drilled out later then filled the holes in with solder. A couple of friends have written and said they liked using sheet metal screws. Now I just kind of leap-frog my clamps right up the side soldering as I go. The clamps are great heat sinks so the prior solder does not melt. It takes a little fooling to get the placement figured out, but you can do it! Likewise, make a similar round plug for the cone bottom dust chute and for the transition that connects between the inlet and shop ducting. -
Thoroughly clean the whole cyclone with lacquer thinner again prior to painting. Probably best to not rough up the galvanized sheet metal, but instead start with metal primer designed for galvanized followed by whatever paint you want. Dizzy used a color similar to Jet tools that some posted as being Krylon Ivory.
-
I recommend doing careful homework before installing an oversized fan impeller. If you do, never run a blower that has an oversized impeller with unrestricted airflow as that can quickly burn up a motor! Also, make sure you use a reliable amp meter at least during the building and testing stages to ensure you are not drawing too many amps and overstressing your motor.
-
I also recommend that if you can afford it, there is considerable benefit to putting an AC amp meter on your cyclone. It will tell you how well your cyclone is working and when to empty filters. A Magnehelic® gauge will do the same thing for you and give you bragging rights in terms of a pretty good idea of CFM airflow. The correct sized gauge should be the Dwyer 2010 gauge with a 10 inches of water pressure range and the built in CFM scale. Most of the gauges readily available on EBAY are for much larger or smaller ranges and lack the second CFM scale. If you are lucky enough to find one on EBAY, a 10" scaled Dwyer gauge will cost about $30 plus you still need tubing and a pitot tube. The Dwyer 166-6 or 167-6 pitot tubes that we need to measure hobbyist sized dust collection are near impossible to find used and cost about $54 including shipping and handling from Dwyer.
-
-
I've spent weeks reading your huge "brain dump" of information here. As a fellow engineer I find it incredible that someone of your obvious skills would take so much time to share all, particularly in enough detail that even the very inexperienced can not only build your design, but learn the why behind almost every step. On one hand I hate this because as an equally obsessive engineer I cannot move forward without reading it all and you give way more than I really want or need. It is equally obvious to me that you must get a ton of email as my following of your pages over the years show that you continue to enhance and refine them regularly. What in heaven's name inspired you to do this much work and keeps you attending to this monster effort? Without mincing any words I installed the top magazine recommended and most expensive small shop cyclone then landed in the hospital in 1999 with dust triggered pneumonia. Make no mistake that pathetically designed dust collection system advertised to protect our health put me into the hospital and in spite of my best efforts continues to leave woodworkers all over with clean looking shops that build dangerously high airborne dust levels. My damaged lungs required me to either fix my fine dust collection or quit woodworking. I spent a lot of money on that cyclone and its filters, so did my best to figure out how to make it work well. I shared out my recommended changes on my Cyclone Modifications web pages and since then almost every small shop vendor has adopted a majority of my recommendations.
Unfortunately, all my efforts did was slightly improve separation efficiency and keep that cyclone and its terribly undersized filter from plugging so quickly, so I had to start over. I needed double the airflow of that cyclone that all other small shop vendors copy. No amount of changes to the cyclone got the airflow up enough to provide good fine dust collection. I also had no more room in my circuit breaker panel, so going to a much bigger blower did not make sense. The Fan Laws show that to double the airflow I had to square the horsepower, so for my larger shop would need at least a 10 hp motor to power that dismal cyclone design. I could squeeze another 240V circuit, but not the amperage to start and run a motor that big. This left me with two choices, get a more efficient blower or get a more efficient cyclone. I chose to do both. Lots of research and considerable testing went into making my resulting cyclone and blower designs far different than that 2D2D or typical 1D3D agricultural cyclone. I took my resulting airfoil blower and cyclone designs to firm of patent attorneys. Their patent search found both combine and innovate amply that I could easily patent them. I chose to instead share my designs here on these web pages so other woodworkers could avoid health problems similar to mine. Here are some of the other considerations that went into my design:-
Cyclone Blower: My testing found the fierce competition between vendors created a world of badly underpowered hobbyist cyclones. Almost every hobbyist cyclone used the same design, all copies to some degree of the early Delta commercial outdoor cyclones which copies that 1963 New York State Department of Public Works design. To use one of these very high resistance designs in my large shop I need a 5 hp motor and much larger impeller. Otherwise it would not move enough air to collect the finest, unhealthiest dust as it is made.
-
Cyclone Design: Guess what else? My expensive hobbyist cyclone was designed to sit outside and beat the ever loving out of cotton to separate off that fiber from sand and dirt. This design may work well outside, but when downscaled and brought indoors creates problems. It separates off all the same chips that we would get with a broom and blows all the fine dust right through into my filters. Although the vendor could still accurately claim it was 95% efficient in separating off the wood dust by weight, they neglected to mention that this remaining 5% makes up close to 100% of the unhealthiest airborne dust and their design sends almost 100% of this airborne dust right into the filters. As a result, our fine filters quickly plug, meaning every couple of hours of use, killing the airflow needed for good fine dust collection. Cleaning these filters frequently gives us a dust bath exposing us to the fine dust we should avoid. Cleaning these expensive filters also rapidly wears them out.
I then went looking hard at every other cyclone and even trashcan separator design. None did a bit better, and most far worse with huge losses due to very high internal turbulence that causes high amounts of resistance. By this I mean it takes a full 1 hp extra to power a cyclone or trashcan separator due to this internal turbulence to get the same airflow. I read about some success using a James Halbert's "neutral vane" that is an extended inlet so the incoming air does not crash into that already spinning inside the cyclone. Adding one of these saved almost 30% of the resistance, but my cyclone still did not separate off the fine dust and moved far too little air for my shop. I went back to the research and found we really needed to start over to clean up the airflow within the cyclone.
Recognizing that typical hobbyist cyclone designs were not a good solution I started over going back to the swirl tube theory and then redesigned a new cyclone that is optimized to minimize internal turbulence to permit using the smallest possible blower while maximizing fine dust separation. Although I started with the 1D3D cyclone from the Cotton Site research because of its airflow efficiency, I then redesigned the inlet, added an appropriate helical baffle (air ramp), and redid the internals. I designed a new rectangular inlet sized to minimize resistance while gently laying a smooth flow of air flat onto the cyclone outer wall and not let it touch any already moving air. I added an elongated inlet to further stabilize the air. I changed the internal geometry of the cyclone so the air did not have to compress at all within the cyclone. I also came up with an optimum angle for this inlet that gets rid of most of the fine dust. In short, all the internals on my cyclone are different from a standard 1D3D cyclone. I also had to address the cone length because the unit would be too tall for my 8' shop ceiling. Coming up with the 1.64 cone multiplier took a lot of research, modeling, prototyping, and testing. Other vendors simply keep opening the size of their cone outlet (dust chute) until they quit getting plugging. That cost them almost all their fine dust separation, but they like the idea that customers will constantly have airflow problems and need to buy new filters four times as often. My resulting cyclone gets the same 95% of the heavy dust as other hobbyist cyclones. It also gets 95% of the fine dust. Many tell me they rarely get more than part of a cup of fine dust after months of use.
-
-
After years of reading on the woodworking forums that it will take me at least 80 hours and cost me over $1200 to build your cyclone design, many are afraid to build your cyclone. With what appears to be hundreds already having built your cyclone, something does not make sense. If it is really so expensive and hard to make your cyclone design, why have so many done so? Your cost and time estimates are almost double what it really takes. Sadly, you are getting sucked in by bad information being given out by a few who would like you to do anything except make a cyclone from my plans. It is no secret that my design and these pages have seriously embarrassed almost all of the major suppliers of small shop dust collectors and cyclones. Sadly, rather than fix their dismally performing equipment a few of these vendors actually pay shills to work the various woodworking Internet forums to pass on this kind of bad information. My cyclone was engineered not to make a profit, but instead to protect my family and me. In more than fifty years of woodworking and evolving my dust collection I made a lot of mistakes and learned considerable eventually ending up sucking an oxygen hose. While laid up in bed bored, I chose to put my three engineering degrees and practical experience to work building a better cyclone. When back on my feet I turned those plans into a working cyclone. My doctor talked me into sharing what I learned and my plans. I shared out my cyclone and blower designs for free for anyone who wanted to build a system instead of getting a patent for my efforts and turning them into a commercial venture. Almost every brand of hobbyist cyclone now "borrows" portions of my plans, unfortunately all make so many compromises there are still no other cyclones available that do a good job on the fine dust separation we need to protect our fine filters.
Regardless, after sharing quite a few chose to build cyclones from my plans. Word spread quickly through the various Internet woodworking forums that my cyclone worked very well. Overwhelmed with questions and asking for help with parts suppliers, I designed some alternatives and talked a number of vendors into helping hobbyists out with bulk purchases to keep the costs for our motors, impellers, filters, and flex hose low. This made these cyclones even easier to build. I went one step further helping my son and daughter make a little extra spending money by having a local laser cutting firm cut kits and then do the forming to make them easier to assemble. This reduced the normal build time from 25 to 30 hours starting from scratch by about half. I am disabled and could not keep up with that business, so I allowed another to take it over. It did not work out and I eventually moved on. His friends took things badly and ever since have gone out of their way to say how difficult it is to build one of my cyclones even with a kit. With both of my children away at school and me unable to do this kind of work I just let things slide thinking eventually the building would resume. I am happy to report it is picking up and that almost all continue to be very pleased with the very good performance of these units. As of December 2009 the feedback says without doing any scrounging or using lesser quality parts it costs about $850 to build a cyclone from my plans including blower. Many find with some scrounging on their motors, blowers, and ducting they can cut costs by half or more. Those who now use my cyclone design swear by it, often having clean shop air for the first time in a lifetime of woodworking. Ed Morgano so liked my cyclone design he built for his son, he built one out of clear plastic and created Clear Vue Cyclones turning that into the number two producer of small shop cyclones before Ed retired. That firm was sold and is now back in production turning out cyclones that continue to please every customer. -
I know a few people that I much respect who strongly recommend the cyclones they built from your plans. I want to have the peace of mind of having really good fine dust collection in my home basement shop. I also have a job that owns me, so the last thing I have time for is building my own cyclone. Do you recommend anything other than building a cyclone from scratch from your plans? When Clear Vue Cyclones was shut down between owners, I talked my son into again selling precut metal cyclone kits and CNC cut blower kits. These kits are not preassembles as the Clear Vue units are, but they do go together quickly and pretty well. You should consider one of these.
-
What is meant by a 2D2D and 1D3D cyclone design? Cyclones are often named based upon the ratios of their parts. A 1D3D cyclone, also referred to as a 3D, is a cyclone that has an upper outer cylinder with a diameter of D and a cone that is three times longer or D*3 long. Each different cyclone design has specific strengths depending upon the ratios between their parts. The 2D2D was designed to separate a fixed larger particle such as grain from lighter husks. It works, has a low overall resistance, but does not at all separate fine dust particles because it was built to send them right out the top! New York State Department of Public works shared this 2D2D cyclone design in 1963 and since then with instructions to vent it directly outside without using filters. Since then almost every major woodworking cyclone for both small and large facilities uses this same basic design. Sadly, this design remains totally inappropriate to use with fine filters as so many small shop vendors now do.
-
I understand a tighter diameter cyclone is more efficient for separation, but the smaller the cyclone the bigger blower impeller and motor needed to overcome the extra static pressure caused by turning air in a tighter spiral. Could you just make a really big cyclone and cut down that resistance and actually gain some filtering by having the airflow so slow that the particles just drop out because the airspeed is so low it will not keep the fine dust airborne? You correctly understand that the smaller the diameter the better the separation and higher overhead in terms of needing a bigger more powerful blower. Your idea of making a huge cyclone works great for heavier chips but unfortunately just does not work for the fine dust separation.
What you are really talking about is building what is called a drop box. A drop box increases the area of a duct enough that the airspeed falls off so far the particles can no longer stay entrained (kept airborne), so they just fall.
To build a drop box that works, you need to know the CFM produced by your system because CFM and airspeed are related through the air equation where FPM=CFM/Area. If the airspeed drops below 2800 FPM than heavier sawdust and chips fall out of the air stream. Many use trashcan separator lids (a simple form of a drop box) which work great on the larger chips and sawdust until we let the air volume go over about 500 CFM. Then the airspeed inside the can stays so high that most of the sawdust passes right through. My cyclone design powered by a 15" impeller draws a maximum of about 3.5 hp and pushes about 1200 CFM minimum through my cyclone assuming a 6" inlet and clean new filters or venting outside. Since FPM = CFM / Area in square feet that gives us 1200 / (3*3*pi / 144) = 1200 / 0.19635 = 6111 FPM. We also know that air speeds over 50 FPM will keep the fine dust entrained which means keeping the dust airborne. From that same formula FPM = CFM / area with our 1200 CFM and a desired FPM of <50 we get area = 1200 / 50 = 24 square feet. A tube with a 24 square foot area has a radius of (24 / Pi)^0.5 = 2.76 feet or about 32" radius which comes out to a 64" diameter exit tube! Moreover, this still only reduces to 50 FPM and we need less. I've computed this a few different ways in the past and every time come up with needing a drop box that is bigger than 5' in diameter and at least three times that in height. A traditional cyclone design overcomes this size problem by using centripetal force to keep the particles pressed to the inside of the cyclone where gravity will make them drop into the collection bin. My design goes one step further and uses laminar flow to with centripetal force to separate off the fine dust then uses a directed air stream to wash and keep the finest dust into the collection bin. -
Although you recommend using a 1D3D cyclone design, your plans and kits all use a cone that is 1.64*D long. Why? I only recommend using a 1D3D design if you use a traditional New York State woodworking cyclone that brings the air in horizontally and depends upon gravity to drop the heavier material. Researchers found cyclones have a reversal point where the air traveling down the inside of the cyclone reverses direction and heads up to exit. If the reversal point is too high it holds the chips and shavings from falling into the collection bin creating the plugs that are common to most small shop cyclones when they suck up lots of shavings. Likewise, if that reversal point is too low then the cyclone sucks the fine dust right out of the bin just like a tornado. Every small shop vendor cyclone my professor friends and I tested failed to have the reversal point properly established. I believe this is because these small shop vendors simply copied commercial cyclone designs without a clue that they also needed to do some very careful airflow balancing to get the reversal points properly adjusted. I did that work and came up with the revised cone shape now used by every major small shop vendor but one. Magazine testing showed that one cyclone that failed to follow my recommendation makes cyclones that separate far worse than $25 trashcan separator lids.
If you use my cyclone design with angled inlet and air ramp then the 1.64 ratio works far better. I went with a 1.64D cone length after going through the swirl tube physics and math needed to optimize each of these factors with the shortest natural reversal point to permit the shortest cyclone so woodworkers could fit it under their ceiling. My testing and independent medical school testing shows that my resulting cyclone has a third less resistance and provides over five times better fine dust separation which makes for much less filter cleaning and greatly extended filter life. -
I read on a web page that you simply copied an existing agricultural cotton cyclone and there really is no such thing as a Pentz design. Is this true, and if not, why is your design unique? This nonsense first appeared on the web pages and forum posts from someone who years after I shared my cyclone and blower designs a fellow agreed to pay me a little for the right to sell a kit cyclone and blower based upon my designs, stole them without paying a thing, ran up bills in my name, then tried to rationalize his theft on his web pages with a bunch of nonsense. My cyclone design is unique and my own based upon a lot of my research and testing. He contributed nothing but messing up the inlet against my advice.
-
I bought one of your early cyclone kits and it does not have an air ramp. Do I need one, and would it work better with one or not? Air Ramp: Actually you bought one of the kits from a fellow that I later fired because he so messed up my design with the kits he sold. Instead of using my cyclone design used by hundreds all over the world he and his metal cutter made a bunch of quick changes without consulting me. They modified the inlet from my recommended 4.5" x 9" size to 4" x 10" so customers would not have to make their own transitions. They could simply buy an HVAC 6" to 4" x 10" heater vent. Rather than go through the entire design changing all to fit with that new sized inlet, he only changed that one part which also caused the air ramp to no longer fit, so they simply chose not to include that ramp. The resulting mess increased the overall system resistance by 100%, cut airflow by over a third, and killed the fine dust separation. I ended up recommending to the roughly two hundred people who got these cyclones that they add in the air ramp from the plans shown above on this page. That immediately repaired these problems. Using the air ramp saves roughly a half horsepower and will roughly double your filter life by greatly increasing fine dust separation.
-
What are the pro's and cons of the 2D2D Vs the 1D3D and 1.64D setups? Both the 2D2D and 1D3D cyclones were designed to separate agricultural products. The 2D2D primarily separates off grain from husks by blowing the husks out the top. It does the same with most sawdust and shavings, so is not a very good woodworking cyclone because all airborne dust and shavings land in the filters. Likewise, the 1D3D was designed to separate cotton fiber from dirt and sand. The finest, unhealthiest dust is lighter than cotton fiber, so it passes right though this type of cyclone. The 1.64 times D cone multiplier is my innovation with my unique design. When used with a 18" diameter cyclone which is ideal for most small shop woodworking this cone ratio permits my cyclone to still fit under an 8' roof.
-
I have the 2 hp Delta motor and a Sheldon's Engineering #1225 airfoil on order. Have you come up with a design to mount the motor/blower assembly to shock mounts on the ceiling that also allows access to the blower for periodic cleaning? Lucky you! Neither these motors nor that impeller remain available. And yes, to both questions. To mount the motor I bought some strap metal and formed a total of eight U shaped pieces. I mounted four, one in each corner of the motor board base with the curved side up (see picture below). In the center of each I put in a neoprene shock mount cylinder that had a bolt coming out each end. By taking another U, turning it upside down and twisting it 90 degrees I was able to "capture" that shock mount and mount the second U to my mounts that attach to my ceiling joists. I used T nuts in the blower housing that I bolted through the motor board base to hold on the blower shroud.

-
You say you mounted the 1 1/2 hp Delta motor and impeller on end. Will this result in burning out the bearings someday? The mounting vertical only presents a problem if you have a motor without permanently sealed bearings. In the case of the Delta 2 hp and the Leeson motors I now recommend these all come with large sealed bearings so vertical mounting poses no motor problems. The big problem from vertical mounting remains impellers slipping down motor shafts when held by set screws. See my blower page for more information on properly mounting the impeller to the motor shaft.
-
You know that all of your joints have 3/8" overlap on each side? This makes for soldering areas that are a full 3/4" wide. Why would you not just have one side overlapped 3/8"? That seems to make more sense. You are absolutely correct. I did design my plans with a 3/8" overlap on both sides of the upper cylinder, the outlet cylinder, and the cone. These sized tabs let us bend the 3/8" tabs vertical and use those tabs to clamp each of those pieces with simple c-clamps ready for soldering. After, they can cover the joint with shiny automotive car-door plastic trim. Likewise, these wide joints also provide good mechanical strength and enough room that propane soldered joints don't end up leaking lot lead during solder all over.
-
I have the Harbor Freight 5 hp compressor motor with the Jet DC-1900 14" impeller. I have two questions. First, how much clearance should I allow for the impeller inside the blower and how big to make the blower outlet? Second, how do I mount this to either the ceiling or the wall? That's lots more than two questions!
The blower height should be tall enough to give your impeller 1/2" clearance below the impeller, the width of your impeller and at least 1/2" to 1" above the vanes. If you are making a normal pull through cyclone give yourself 1/4" clearance between the impeller and the jog in the outlet that gets closest to the impeller as opposed to only 1/8" clearance if you are using an airfoil impeller. If you are making a push through where material can directly hit your impeller, you need to increase that clearance to 10% of your impeller wheel width or 1", whichever is greater, to keep from getting jams. The blower outlet needs to be anything over the area of a 5" circle for a 2 hp or smaller blower and 6" circle for 3 to 5 hp blowers.
Here are two different approaches to hanging the motor and blower on the same diagram. I like the idea of hanging the motor and blower so they can stay in place and I can independently remove the cyclone. The motor and blower are too heavy for me to want to lift. The right side shows the configuration for a ceiling mount and the left side shows the configuration for a wall mount. In either case, with the Harbor Freight motor there is a roughly 3" lip around the motor shaft that needs to be inset into your MDF or plywood, preferably onto foam insulation to make a good seal.
-
-
Can you tell me the size of the footprint and height of the new cyclone with the 5hp motor? The cyclone footprint is 18" in diameter. The blower footprint is 26" square but sits up above the cyclone, so is mostly out of the way. The filter footprint is about 13" in diameter depending upon brand. The cyclone height depends upon which cone configuration you use. My motor is about 12" tall, the blower 8", and the cyclone about 54" tall (using a 1.64 cone multiplier). That totals 74" above the dust collection bin. You need at least 4" of flex hose below the cyclone, so with an 8' ceiling I am limited to a collection bin that is 18" tall.
-
Okay, I built this thing and it is too tall for my trashcan that I planned to use. Why didn't you make this a shorter unit like the other vendor designs? Almost all other cyclones follow one of two designs, and both were engineered to separate and blow away the fine dust outside while dropping the heavier sawdust and chips into a bin. These designs use short squat cones and trade size for separation efficiency. Their level of separation efficiency relies heavily upon the filters for protection. I chose to go a different direction wanting to use the smallest possible motor, with a goal of moving at least 800 CFM airflow with only a 1.5 hp motor. I was successful, but then discovered that to handle the overhead of my large shop and move enough air for good fine dust collection I needed at least a 3.5 hp motor and a bigger blower. I went with larger blower and motor. The results work well without having to build a bigger cyclone. My design moves more than the 1000 CFM airflow we need at our larger tools with a 2-hp motor driving an airfoil or a 3.5 hp motor driving a 14" impeller. When equipped with the 15 and 16 inch impellers now being used by many and a 5 hp motor, the result is incredible. So, to answer your question I traded some extra height for efficiency in both power and particle collection. I found using a standard metal 30-gallon drum lets me fit my blower, cyclone, and dust bin comfortably under an eight foot ceiling. If you have less room that 8', you can use a side outlet instead of top outlet and put your blower elsewhere instead of on top.
-
What would be the downside/upside of taking the motor and impeller off the top of the cyclone and inverting it and then taking a U of flex tubing from the top of the cyclone to the impeller to make a pull through unit with the blower mounted on the floor? Using tight radius or right angle bends on such an arrangement kills some of your airflow. If you use 9" diameter duct and keep the radius 18" or more, in theory there will be minimum resistance from the bend. If ceiling height is a problem, seriously consider making either a side outlet cyclone or build a push through cyclone (sorry, but no airfoils in this mode) following the same ducting plan but feed into the cyclone inlet with the blower connecting to your ducting.
-
My basement ceiling is too short to mount it to the top of the cyclone. Can I mount my motor to the side? A few have done just as you suggested. By mounting the Leeson motor pointing up and reversing the direction of rotation it works well. The nicest implementation I've heard of used a variable pulley and slave pulley to permit adjusting the RPM. You can go up about 25% in speed without worrying about the impeller if you use either our 15" impeller or 14" Jet impeller.
-
Is there any advantage to making a push-through cyclone instead of a pull through? It makes no difference at all because the resistance is the same on either side of the blower. I don't like push through cyclones because just like our dust collectors all must first go through the impeller. Hitting a heavy steel or aluminum impeller can damage the impeller and create an out of balance situation that quickly ruins our motor bearings. Hits with metal hardware can also create sparks that may cause nasty delayed action fires. The only real advantage to a push through cyclone is you can just use a plastic dust bag on the bottom of the cyclone without all the overhead of making sure all is perfectly sealed.
-
I work in the sheet metal industry and wondered why you did not design this cyclone to be 16 or 18 gauge metal? Could I make one out of that heavy of metal? How about using stainless steel? My son's laser cut kits are all 22 gauge metal. When I hand cut a cyclone I use 24 gauge metal because I can cut it with tin snips and it does not collapse. 16 or 18 gauge would be better, but don't think average woodworkers have access to the tools needed to do the cutting, fold the inlet, roll the curves, or hold the cylinders and cone together. If you have those tools, then the heavier metal would last far longer. Likewise, so would the stainless, but again that takes special tools to weld and properly solder. I know because my own cyclone is 22 gauge stainless all spot welded then silver soldered together.
-
I do woodworking as a hobby and have zero interest in either learning how or buying enough tools to work with sheet metal. I have a nice 5 horsepower Baldor motor and am ordering up that 14" Jet DC-1900 impeller to make a cyclone. I took your plans to a local HVAC shop and they said they would build me a cyclone for a modest fee. The only problem is they want to use 30 gauge metal instead of the 24 gauge you recommended. Will that work? The 30 gauge will work, but the first time you close all the blast gates with that big motor turning that impeller your cyclone may well become about 1/2" thick. You need to either install reinforcing rings around the upper cylinder or use heavier metal, at least 24 gauge. Perhaps you buy a 4'x10' sheet of 24 gauge and they use their tools to build it?
-
Now I'm really confused. I had just made up my mind to buy the airfoil impeller with that 2 hp Delta motor, and suddenly you are saying to buy a 14" Jet DC-1900 or even larger custom made impeller and use an expensive Leeson 5 hp motor. Why can't I use that inexpensive Jet impeller with a cheap Harbor Freight motor? I powered my first cyclone with a new Baldor motor driving a Cincinnati Blower. My airfoil powered cyclone used a new Delta 2 hp motor driving my custom designed airfoil impeller. The airfoil just does not work for larger shops that need more than 7" of pressure as it stalls and can ruin the motor bearings if the pressure climbs too high. This makes it unsuitable for use with filters or in large shops. Many asked me to come up with an equivalent solution without the problems of the airfoil. Many buy inexpensive lesser quality dust collectors that could spend about the same amount and end up with cyclones. I know there are less expensive impellers than the Jet or the custom larger impellers I get made by Clear Vue, but the Jet and Clear Vue impellers are top quality and far quieter, plus the cost difference for something a whole bunch less quality was under $10. That is why I specified the Jet impeller for the smaller shop cyclones and the Clear Vue larger impellers for average and larger shops. Likewise, the Harbor Freight Motor is not by any means the best quality, but their 5 hp compressor motor is inexpensive particularly on sale. I know many cannot afford to spend two or three times that for a good quality motor. So if you have the money and patience to keep up with the airfoil, buy that. Otherwise, buy a Jet or Clear Vue impeller with a bigger motor.
-
How does the cyclone body mount and dismount from the blower/motor assembly? I've used two approaches to mount the cyclone to the blower shroud. For one, I screwed the top MDF donut that holds the cyclone to the bottom of the blower using T nuts. I had predrilled holes all around the perimeter and just screwed the cyclone to that donut and was done. For the second I bought four footlocker wire cam latches. I screwed the female parts to the donut and the male parts to the cyclone. Lifting the cyclone up and onto that cylinder then latching those four down pulled the cyclone up nicely, but it did take a second ring with insulation to make a good seal. After building dozens of these with feedback from hundreds most now prefer to screw the cyclone blower to the cyclone top and simply undo the motor plate connections to drop the blower housing and cyclone together.
-
I want an airfoil impeller, but am terrible at doing maintenance. Is there something that you could coat that impeller with that would reduce or eliminate my having to clean it? Unlike self cleaning material handling impellers airfoil impellers need regular cleaning to ensure we don't build up crud that causes an out of balance condition that quickly ruins motor bearings. Even if you coat an airfoil it still can build up strings and long shavings so must be regularly inspected and cleaned. Regardless, you might be able to get a gunsmith to coat the impeller with Teflon or find a can and spray it yourself. That spray used to be readily available, but I have not seen any in a while because baking it in our ovens gives off toxic fumes. If you really are not willing to do the upkeep, then buy the larger motor and material movement impeller.
-
Is there a concern with the start-up torque of the motor enlarging the mounting holes in the MDF or plywood blower unit top? I suspect what you are asking is for some help on the nasty false rumor again created by some of the vendor paid shills that the MDF parts in the Clear Vue Cyclone are poor quality and inappropriate to use with a cyclone design. Clear Vue Cyclones implemented my blower design with a CNC routed MDF motor plate. That motor plate is now in use by thousands all over the world with no problems at all. I do recommend that you spray paint these for added moisture protection but as long as you bolt the motor on tight that MDF motor plate works fine and poses no problems. That motor plate is an integral part of my design to save your back because the motor and blower impeller stay mounted while you separately take down the cyclone and blower housing. In my son's blower kits he includes a 1/8" thick laser cut steel plate for the motor mount which is what I use on my personal cyclone. Many also cut their motor plates from heavy Baltic birch plywood. These all work well.
-
Is your design like the Wood Magazine cyclone plans where they cut the air inlet flush with the upper cylinder? No, the inlet goes inside my cyclone design goes right to the center edge where the joint is for the outer cylinder. This is a much more efficient way to build the inlet instead of having to add a less efficient "neutral vane" later. The inlet sets the angle for the air ramp and how to cut the outer cylinder.
-
Where does the air ramp go? The air ramp starts on the top of the cyclone inlet and spirals down to the bottom of the inlet making one revolution around the cyclone outlet cylinder. Unlike the below picture that shows how I used to attach the air ramp to the outlet cylinder, now I find that soldering the air ramp to only the cyclone outside cylinder instead of the outlet cylinder works best. Because the air is moving very slowly next to the outlet, this is not that important, but a good seal on the outside is!!
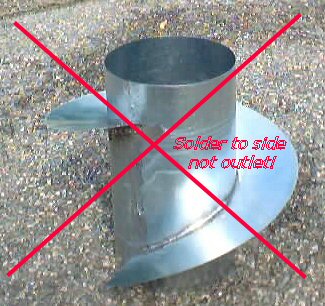
-
Does the air ramp go right to the edge of the cyclone? Yes, the air ramp helix goes right to the edge of the cyclone and is soldered there to the outside cylinder. It only fits close to the center cyclone outlet cylinder and that joint should not be soldered or sealed so we can take our cyclone apart to clear plugs or trapped debris.
-
What angle does the air inlet enter the upper cylinder? The angle is the same as the angle that the air ramp spirals down. To understand it takes a little work. The inlet stops at the center seams of both cylinders inside the cyclone. The air ramp makes one rotation around the inside. If you were to flatten out the outer cylinder after drawing in the line that the air ramp makes when touching the outer cylinder is a diagonal of a right triangle. That triangle has a height that is the same as the inlet and a width that is the same as the distance round the outer cylinder. In fact, that same diagonal length is the circumference of the air ramp outer diameter. The same is true for the outlet cylinder as the diagonal on that cylinder sets the length of the inner radius for the air ramp. To make all this work, the angle is the same as you would get by just extending the diagonals. To draw the angle you can start just below the MDF and go to the edge.
-
How do you position the inlet and mark the outer cylinder for cutting? Although you can calculate the angles to cut the outer cylinder for the inlet, I found it better to build the inlet and solder it up. Then build the outer cylinder, but don't solder, just hold together with either clamps or pop rivets. Put a mark on the outer cylinder where the bottom of the MDF will sit. Now with a straight edge put the inlet up against the outer cylinder curve and move it down until it comes out just below where the MDF will hit. I take a flat sharp tipped piece of metal and scribe the upper and lower cut lines. If you have a very clean inlet, you can cut to size and solder will fill in any gaps. If you made a rough inlet, then it is a good idea to make your cuts 3/8" inside of that line, then make tabs that you will bend outward to solder the cyclone to the inlet.
-
Does this angle matter? The closer you stay to the same angle of the air ramp, the less resistance and the better your cyclone will perform both in terms of needing less horsepower, and in terms of better separation.
-
Does the air inlet get cut away where you have the hidden lines on your spread sheet? No, the outer cylinder ends up being cut, following the procedure I just described.
-
I'm confused about the inlet. From the drawing it looks like it has a strange cut. Hopefully it will be explained in the building instructions. Pictures would be good! The inlet has long been a source of confusion. My original drawing and dimensions did not show this as a parallelogram, but they are now corrected. The inlet is a simple box setup as a parallelogram. By slanting the ends of this box, it makes a nice easy seam with both the outer and inner cylinders.
-
I'm confused about the connection between the inlet and my 6" ducting. Help! Pictures would be good! The complication comes from connecting the end of the inlet, a rectangular box, to a round piece of ducting. I finally got so many questions on how to make this transition that if you now look above at inlet transition and it will show you in detail how to develop your own transition in sheet metal. It takes some work, but is not all that difficult.
-
I noticed that you do not have to put the motor and blower on top of the cyclone. That would be ideal for me as I have a basement shop that does not have enough ceiling height to mount the motor above. What mounting configuration will give me the least tall cyclone? If you study the cyclone plans carefully, you will se you can seal the air ramp and create a blank space where the aid is isolated. You can take the air out of the top of cyclone or through that blank space. Below is a picture plus dimensioned drawing for a cyclone top with the air going out the side.
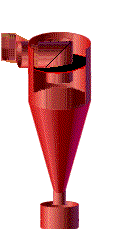
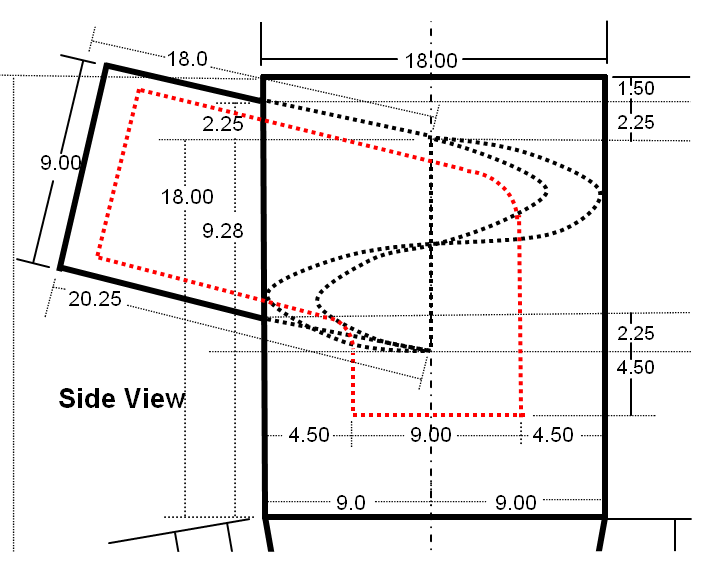
-
Which motor would you recommend with the Jet 14" impeller the Harbor Freight 5 hp or the Delta 2 hp on EBAY? Neither. Buy the 5 hp face frame mount Leeson motor I recommend with a 15" impeller from Clear Vue. The fan tables and lots of testing show that we need at least a 14" diameter impeller to move the minimum airflow required to get good small shop fine dust collection. When turned at the typical 3450 RPM motor speed these 14" impeller draw just over 3.5 hp with my cyclone design and about 3 hp with the other less efficient cyclone designs. This draw will quickly burn up 2 and even 3 hp motors. The Delta 2 hp is way too small to push more than a 12" material handling impeller without burning up the motor. Since standard affordable induction motors come in 3 or 5 hp sizes, I recommend you buy a 5 hp motor. That leaves at least 1.5 hp available. Although the 14" moves ample air, I prefer to use this extra horsepower to drive a 15" impeller which leaves a little more cushion in terms of total airflow. Additionally, the Jet impellers use a tapered metric sized arbor that will not fit standard cylindrical motor shaft sizes. This means you need an adapter. Going rate in 2010 from one of my machinists who turns out lots of these adapters is $100 each. By the time we add the cost and trouble of adding the adapter, most find the Clear Vue impellers with their much better compression arbors provide a better overall solution. Although the Harbor Freight 5 hp compressor motors work, they also have a history of not working all that long plus have fairly poor quality bearings. I did lots of homework and settled on recommending the American made 5 hp Leeson motors. It makes no sense to me to recommend a poor quality motor for the most heavily used motors in our shops.
In any case after you get the blower, cyclone, ducting, and filters assembled, you need to measure the amperage draw on any of these motors. If it is too much, then you need to reduce the size of the inlet to your blower or to your cyclone a little. Always check your amperage after assembly to make sure you don't have too much airflow that could damage your motor. -
I decided not to mess with the airfoil, so bought the Jet impeller with the 5 hp Harbor Freight motor. How do I make my HF 5HP motor with a 5/8" shaft work with my impeller fan which is a 0.94" tapered hole? Did you have to deal with the same situation? Yes, I had to deal with the same problem. I handed my impeller, motor, and money to my machinist. He refused to make me an adapter for that motor and told me to go buy a bigger motor with a larger diameter shaft. He said the 5/8" HF motor shaft and bearings are too small to support such a heavy impeller. I listened to him as he has been at this a long time and does excellent work. I came back with an inexpensive Harbor Freight 5 hp compressor motor with 7/8" diameter motor shaft. My machinist then pulled a 7/8" keyed arbor from a drawer, welded on a back plate, used the Jet arbor for marking, then drilled and tapped holes. He said we could have rolled a piece of sheet metal to fill the gap, but that was not the correct fix. He also gave me a little tube of Lock-Tite and said to be sure to use it on the bolts and set screws.
-
Do I need to protect the inside of my cyclone? The inside of the top cylinder where the inlet air first strikes is the only place that you really should provide any protection. The entering sawdust hits this one area hard enough to cause wear, generate heat, and release moisture. Many types of wood contain high silica content. This means we sandblast that spot. This blasting and high moisture causes rusts and wears through cyclones right at that impact point. Still, most cyclones will take years of steady use depending upon the gauge metal used. Probably the best thing to put there is a piece of thin rubber such as the Rubbermaid shelving liner I used or square of vinyl upholstery material. Many industrial cyclones end up using either a piece of stainless or of rubber sheet there as well. I was a little surprised to hear that the rubber sheet holds up far better and longer than the stainless. It's true because the rubber gives. This is why putting the vinyl bonnets on cars protects them pretty well from small rock chips.
-
I'm about to build 2 of your cyclones, and have clock-wise spinning impellers. Does it matter which direction the air circulates around the cyclone? Should I reverse the input direction from those on your plans so that the uptake air spin is the same as the cyclone spin? Or is this completely irrelevant given the 16" length of the outlet tube? The air exiting the cyclone reverses direction spinning upward at the reversal point. The direction of spin is set by the direction of the air as it enters the cyclone inlet. Your unit will be a bit more efficient, roughly 0.1 hp, if the blower is already turning in the same direction as the incoming air as it will not have to overcome that spin. Other than this little loss in efficiency, I was unable to measure any difference in overall air volume or airspeed. In short, your cyclone should work just fine no mater what way your blower needs to be oriented. I intentionally made my cyclone with an entry reversed from my plans so it would better fit in the limited shop space available and the result still works well.
-
How can I quiet my cyclone down? It sounds like a jet engine trying to tug away my home?
 If you bolt directly to your framing, most of the noise is fairly low frequency so like a subwoofer will go all over your shop and house if they are attached. I know as I have 12" of well-insulated plenum between my and my teen's room. Now all I hear is the bass. All you can do is to change over the mounting to use shock mounts so the low frequency stuff does not make your shop and or home walls into sounding boards. Grainger's carries them (search under vibration hanger), but pick a set that is sized near the overall weight as heavier mounts provide little vibration protection.
I like adding a muffler. PSI sells one for $49 that I have heard saves about 10 dB as well, but it only fits a 5" outlet that I think is too small. Quite a few have made their own mufflers out of perforated pipe wrapped with screen then with fiberglass followed by being slipped into a larger tube. I tried making one using PVC pipe because PVC helps dampen the noise, but found sliding the outer pipe onto the insulated inner was difficult. For my next I used 8" snap lock pipe on a 6" perforated center pipe covered in window screen then fiberglass insulation. With the 8" pipe it was bear to fasten that center seam but much easier than trying to slip that mess into a tight PVC tube. My Home Depot store had nice tapered 8" to 6" reducers that ended up making a pretty good-looking unit. After I went to all that work, Larry Adcock, creator of the WoodSucker, told me it would have been easier to just use a length of fiberglass insulated HVAC flex duct in place of the muffler as it apparently does a better job and costs far less. I tried that and he was right!
I've since bought a good digital dB meter. I measured 96 db with the blower just going directly into the filter through metal duct. Adding my homemade muffler to that same setup dropped it to 88 dB. It went down to 92 dB using PVC duct and no muffler. Using insulated HVAC duct it went down to 87 dB with no muffler. Using insulated HVAC duct and my own homemade muffler it went down to 82 dB. These test results will vary considerably depending upon how you made your blower, your choice of impeller, motor choice, any coatings or insulation you use, and depending if you use anti-vibration mounts.Rather than attach my cyclone directly to my ducting metal to metal, I use a short length of flex pipe. That keeps the metal from carrying the sound. In spite of my advice, my personal solution involved a lot of work. I hung the whole setup using shock mounts. I used my home-made muffler. The spray helped about 5-10 dB and the muffler they say saved about 10 dB. Wrapping the outlet to the muffler with pipe wrap helped more getting rid of the sounding boards. Also going with MDF instead of my original plywood top on my cyclone seemed to help, but I like the extra strength of good Baltic birch plywood, so continue to use that for my blowers. I did try spraying the cyclone outside, but that did not seem to help much. Spraying the outside metal sides of the blower did seem to help, but I did that before getting my dB meter, so cannot say how much. I also tried putting the cyclone outside, but it was way too close to my wife's study/craft room and it quickly found itself back inside. Probably the biggest help was building a new cyclone that was far more carefully finished so the airflow was very clean.
In spite of my advice, my personal solution involved a lot of work. I hung the whole setup using shock mounts. I used my home-made muffler. The spray helped about 5-10 dB and the muffler they say saved about 10 dB. Wrapping the outlet to the muffler with pipe wrap helped more getting rid of the sounding boards. Also going with MDF instead of my original plywood top on my cyclone seemed to help, but I like the extra strength of good Baltic birch plywood, so continue to use that for my blowers. I did try spraying the cyclone outside, but that did not seem to help much. Spraying the outside metal sides of the blower did seem to help, but I did that before getting my dB meter, so cannot say how much. I also tried putting the cyclone outside, but it was way too close to my wife's study/craft room and it quickly found itself back inside. Probably the biggest help was building a new cyclone that was far more carefully finished so the airflow was very clean.
I have not tried an enclosure myself, but I know a few of the folks who have. They consistently said it did little to no good in terms of reducing the noise. Since those early comments, others have responded with solutions that apparently do work. They have built enclosures with enough room to access the cyclone using either two layers of sheetrock inside and a third outside or sheetrock outside and a 3M construction sound deadening board inside. They also recommended mounting the cyclone on a wall with isolation dampers to keep the wall from being used as a sounding board.
Adding the baffling and sound deadening materials to the outside of the cyclone around the blower and outlet would help considerably. My only caution would be to not use something that becomes a dust collector.
You can also use one of the rubberized spray on compounds such as Dip-It or a plastic based automotive undercoating (not oil or tar). If you use either, be careful, as the odors can be terrible.
Strangely, using PVC pipe instead of dust collector spiral pipe or thick HVAC pipe also seems to help considerably as you don't hear nearly as much sawdust rattling in the pipes.
Yitah R. Wu says: "With regards to cyclone noise, I work in automotive and one product which probably be good for reducing cyclone noise is what we call peel and stick mastic. It's usually in 8x10 sheets and is basically a 1/16" sheet of asphalt and recycled rubber with adhesive on it. It does a great job of both adding mass and dampening for sound deadening of the cyclone itself. Auto parts and auto stereo stores typically carry this material. Some brands are Evercoat Q-Pads and Dynamat."
-
I see benefits in locating the cyclone in the shop and locating the blower in the attic directly above the cyclone. This would add a couple feet of straight pipe, but would help deal with ceiling height limitations and possibly reduce noise in the shop. Do you see any significant drawbacks with this? If you put your blower in the attic, there are a few concerns.
-
The fire codes in most areas require that you use metal ducting and a metal flange through your ceiling for the inlet, and a similar metal duct and flange for your outlet;
-
You will still need to have your dust collector, collector barrel, filter, and filter bin in your shop to make access easy;
-
Obviously you will need to bring power down through the ceiling or at least a good heavy duty switch. If you hard wire it up in the attic, you also have inspection problems, so need a plug up there and switch down lower;
-
Going in the attic is not a good setup for an airfoil blower because you need to check and clean it regularly. Even with a nice pull down ladder to my attic loft area, I am way too remiss to check up there often enough; and,
-
You do need to realize that in mid summer in many areas you can easily burn up a motor it can get so hot in your attic. You might have to do as I did and put in a thermally switched attic fan that goes to an attic vent if yours goes up into the 130+ degree range like mine.
-
-
I take it you soldered your cyclones together?
Yes, for my metal ones I used my propane soldering iron to solder the first one using acid core solder and plumber's flux. I thought I would try my big Weller gun with a spade tip for the second as the propane heat was hard to control and warped the metal from being too hot. The Weller with the spade tip did not work worth a darn. I bought a bigger electric American Beauty 150 watt soldering iron from EBAY and it works lots better, but not as good as the propane torch with a soldering tip. I wish I had bought a 200 watt unit, as I seem to keep making these units. If I knew I was just making one, I would not even consider anything but an inexpensive propane or small butane torch. You can use that tool for lots of things, but what do you do with a five pound soldering iron after you make your cyclone, fix all the gutters, and solder all the joints in your HVAC system air tight?


